
Quick & Easy Recipes for Everyday Cooks
Welcome to Food By Ayaka!
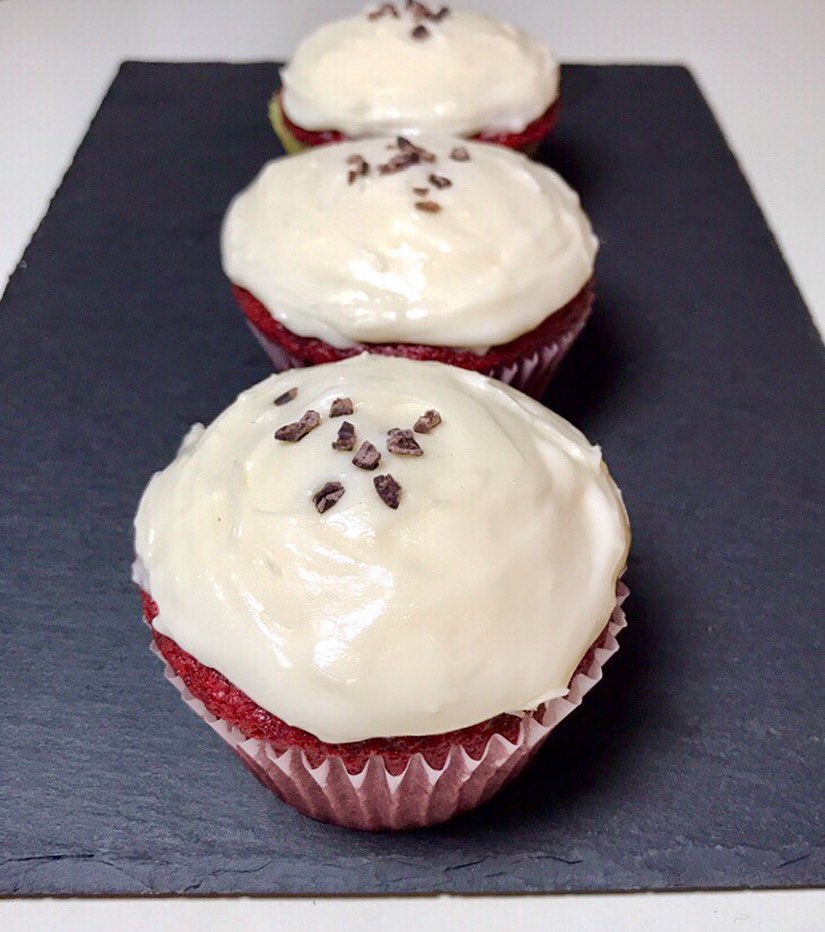
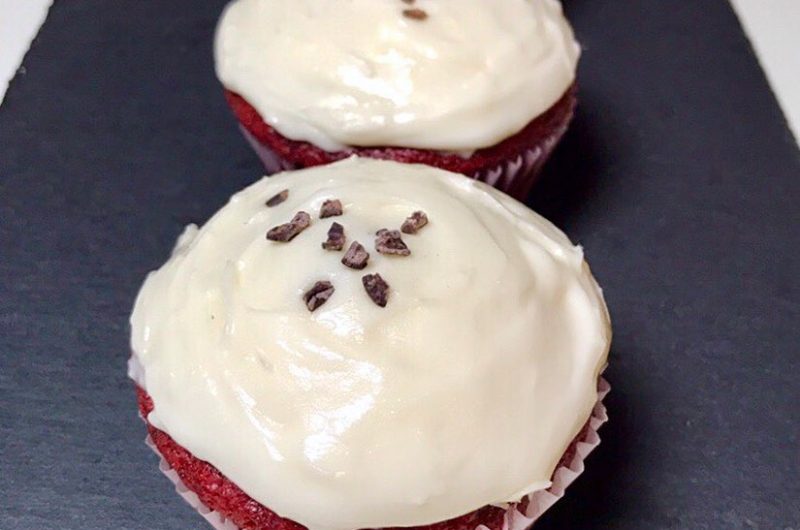
Vegan Red Velvet Cupcakes With Cream Cheese Frosting
These red velvet cupcakes are moist, fluffy, and sweet. Top them off with some vegan cream cheese frosting for an extra decadent treat!
There’s something magical about red velvet cake. The flavor, the color, the texture… it all just screams pure decadence. Even the name Red Velvet is delightful! It sounds rich and luxurious, like something you’d find in a celebrity’s home. Not to mention, red velvet is the perfect cake flavor for so many holidays. The color makes it suitable for Valentine’s Day, the 4th of July, or even Christmas! When it comes to frosting options for red velvet cake, there are only a few flavors that work. Ermine frosting is actually the frosting that was originally paired with old-school red velvet cake. It’s made by boiling together milk, sugar, and flour, then adding butter and whipping until fluffy. It has a neutral flavor that is not overly sweet as well as an amazing unique texture!
However, cream cheese frosting is more commonly paired with red velvet cake nowadays, and for good reason. The gentle tang of the cream cheese perfectly balances out the buttery sweetness of red velvet cake, making for a killer dessert.
When I first went vegan, I thought that I would never be able to enjoy the taste of cream cheese ever again. However, I quickly learned that this was not the case. There are countless vegan cream cheeses available at most grocery stores! As soon as I figured this out, I jumped on the opportunity to veganize my favorite red velvet cupcake recipe.
The results tasted so similar to the original version that my family members almost didn’t believe me when I told them that the cupcakes were vegan. I knew I had to share the recipe with the world, as I’m sure there are tons of vegans out there who are just as obsessed with red velvet cake as I am!
How To Make Vegan Red Velvet Cupcakes
Ingredients
Cupcake Ingredients:
- 1 cup soy milk unsweetened original
- 1 tsp apple cider vinegar
- 1 1/4 cups all-purpose flour
- 1 cup granulated sugar
- 2 tbsp cocoa powder unsweetened
- 1/2 tsp baking powder
- 1/2 tsp baking soda
- 1/2 tsp salt
- 1/3 cup vegetable oil
- 1 tbsp vegan red food coloring
- 2 1/2 tsp vanilla extract
- 1/2 tsp almond extract
Frosting Ingredients:
- 1/2 cup 1 stick vegan butter, softened such as Earth Balance sticks
- 1 8 oz container of vegan cream cheese at room temperature, such as Kite Hill
- 3-5 cups powdered sugar
Instructions
For the Cupcakes:
- Preheat oven to 350°F and line a muffin tin with cupcake liners.
- Add soy milk and vinegar to a bowl and whisk to combine. Set aside for 5-10 minutes, or until curdled.
- Mix flour, sugar, cocoa, baking powder, baking soda, and salt together in a large bowl.
- Pour oil, food coloring, vanilla extract, and almond extract into curdled soy milk and whisk until well combined.
- Gently fold wet ingredients into dry, stirring until smooth.
- Fill cupcake liners 2/3 of the way full until no batter remains (the recipe makes 12).
- Bake 18-20 minutes.
- Allow cupcakes to cool in the pan for 5-10 minutes before moving to a wire rack to finish cooling completely.
For the Frosting:
- Add the softened butter to a large mixing bowl and mix on high speed until smooth and creamy.
- Add the cream cheese and beat thoroughly to combine.
- Add the powdered sugar, 1 cup at a time, until the frosting is thick and spreadable and the desired sweetness has been achieved.
- Spread cream cheese frosting onto cooled cupcakes and refrigerate until ready to serve.
Tips for Perfect Vegan Red Velvet Cupcakes
- Measure Ingredients Accurately: For the best results, use precise measurements, especially when adding the red food coloring. This ensures consistency in color and flavor.
- Room Temperature Ingredients: Allow the soy milk, vegan butter, and cream cheese to come to room temperature before using. Room-temperature ingredients blend more easily, creating a smoother batter and frosting.
Why You’ll Love These Vegan Red Velvet Cupcakes:
- Deliciously Moist Texture: The combination of soy milk and oil creates a moist and tender crumb in these cupcakes, ensuring a delightful texture with every bite.
- Vibrant and Rich Flavor: The addition of vegan red food coloring enhances the visual appeal, while cocoa powder, vanilla extract, and almond extract work together to create a rich and flavorful red velvet experience.
- Dairy-Free Cream Cheese Frosting: The velvety cream cheese frosting is entirely plant-based, and made with vegan butter and cream cheese. It’s smooth, luscious, and provides the perfect balance of sweetness.
- Simple Ingredients, Easy Process: With common pantry staples and straightforward instructions, these cupcakes are easy to whip up, making them a go-to recipe for both novice and experienced bakers.
- Perfect for Special Occasions: Whether it’s a birthday, holiday, or any celebration, these red velvet cupcakes add a touch of elegance to any occasion. They’re a crowd-pleaser that satisfies both vegans and non-vegans alike.
FAQ
Can I use a different plant-based milk?
- Absolutely! While soy milk is used in this recipe, you can substitute it with almond milk, oat milk, or any other non-dairy milk of your choice.
Can I freeze these cupcakes?
- Yes, you can freeze the cupcakes without frosting. Place them in a freezer-safe container, separated by layers of parchment paper. Thaw in the refrigerator before serving.
Why is my cream cheese frosting too thin?
- If your frosting is too thin, gradually add more powdered sugar until you achieve the desired thickness. Additionally, make sure your vegan butter and cream cheese are both at room temperature before mixing.
Vegan Red Velvet Cupcakes With Cream Cheese Frosting
Course: DessertCuisine: American, VeganDifficulty: EasyServings
12
cupcakesPrep time
20
minutesCooking time
20
minutesCalories
450.7
kcalCooling/Frosting Time
45
minutesThese red velvet cupcakes are moist, fluffy, and sweet. Top them off with some vegan cream cheese frosting for an extra decadent treat!
Ingredients
- Cupcake Ingredients
1 cup soy milk unsweetened original
1 tsp apple cider vinegar
1 1/4 cups all-purpose flour
1 cup granulated sugar
2 tbsp cocoa powder unsweetened
1/2 tsp baking powder
1/2 tsp baking soda
1/2 tsp salt
1/3 cup vegetable oil
1 tbsp vegan red food coloring
2 1/2 tsp vanilla extract
1/2 tsp almond extract
- Frosting Ingredients
1/2 cup 1 stick vegan butter, softened such as Earth Balance sticks
1 8 oz container of vegan cream cheese at room temperature, such as Kite Hill
3-5 cups powdered sugar
Directions
- For the Cupcakes
- Preheat oven to 350°F and line a muffin tin with cupcake liners.
- Add soy milk and vinegar to a bowl and whisk to combine. Set aside for 5-10 minutes, or until curdled.
- Mix flour, sugar, cocoa, baking powder, baking soda, and salt together in a large bowl.
- Pour oil, food coloring, vanilla extract, and almond extract into curdled soy milk and whisk until well combined.
- Gently fold wet ingredients into dry, stirring until smooth.
- Fill cupcake liners 2/3 of the way full until no batter remains (the recipe makes 12).
- Bake 18-20 minutes.
- Allow cupcakes to cool in the pan for 5-10 minutes before moving to a wire rack to finish cooling completely.
- For the Frosting
- Add the softened butter to a large mixing bowl and mix on high speed until smooth and creamy.
- Add the cream cheese and beat thoroughly to combine.
- Add the powdered sugar, 1 cup at a time, until the frosting is thick and spreadable and the desired sweetness has been achieved.
- Spread cream cheese frosting onto cooled cupcakes and refrigerate until ready to serve.