
Quick & Easy Recipes for Everyday Cooks
Welcome to Food By Ayaka!
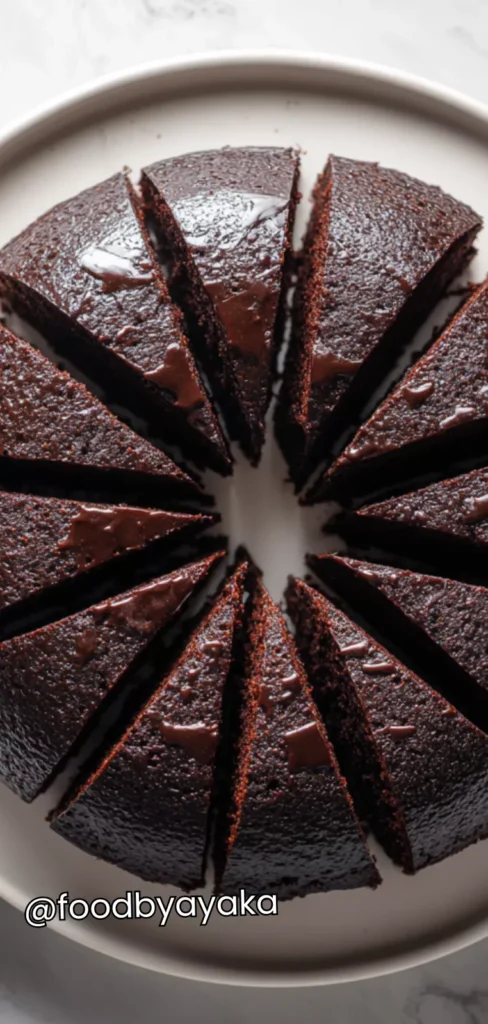
Thunder Cake Recipe
I love chocolate desserts that are easy and comforting, but what makes Thunder Cake really shine in my kitchen is how quickly it comes together and still tastes indulgent. The way the cake rises and forms tiny, soft bubbles in the oven is charming and makes every slice feel homemade and inviting. I also love that the tangy undertone from the vinegar balances the sweetness, giving it a flavor that’s both rich and slightly unexpected. Every bite is moist, chocolatey, and has that light, tender crumb that makes you smile.
Thunder Cake is one of those classic American desserts that feels both nostalgic and exciting. Its soft, rich chocolate base and slightly tangy flavor come from a magical combination of cocoa, vinegar, and baking soda. The “thunder” effect in the batter makes the cake light and airy, giving it a texture that’s just perfect for cozy afternoons, celebrations, or anytime you crave a sweet pick-me-up. Unlike heavy, dense chocolate cakes, this one has a bounce to it that surprises and delights every bite. It’s simple enough for beginner bakers but special enough to serve at family gatherings or small parties.
I have tried many chocolate cake recipes in the past, but I use the Thunder Cake method because it requires minimal ingredients, almost everything is pantry-friendly, and it never fails to impress. Always remember to mix the wet and dry ingredients gently, so you don’t lose the airy texture. The vinegar and baking soda combination is the key to that “thunder” effect—don’t skip it. I also like adding a few chopped walnuts or a chocolate drizzle on top for a little extra treat.
You can serve Thunder Cake warm with a scoop of vanilla ice cream, some fresh berries, or even a dollop of whipped cream. It also pairs beautifully with a cup of hot coffee or cocoa for a perfect afternoon snack. Some like to dust it lightly with powdered sugar for a classic look, or drizzle chocolate glaze for a fancier touch. No matter how you serve it, it always disappears quickly at my house because it’s so soft, moist, and satisfying.
Its Perfect For:
- Cozy family afternoons with tea or coffee
- Celebrating birthdays without complicated layers
- Quick dessert for unexpected guests
- School bake sales or potluck gatherings
- A sweet treat for yourself after a long day
Ingredients
- 1 cup all-purpose flour
- 1 cup granulated sugar
- 1/2 cup unsweetened cocoa powder
- 1 teaspoon baking soda
- 1/2 teaspoon salt
- 1/2 cup vegetable oil
- 1 teaspoon vanilla extract
- 1 tablespoon white vinegar
- 1 cup cold water
- 1/2 cup chopped walnuts (optional, for added crunch)
- Powdered sugar or chocolate glaze for topping
Kitchen Equipment You’ll Need:
- Large mixing bowls
- Whisk or spoon for mixing
- Measuring cups and spoons
- 8-inch round or square baking pan
- Oven
- Wire rack for cooling
- Optional spatula for glazing
How to Make Thunder Cake
Step 1
Preheat the oven and prepare pan: Preheat your oven to 350°F (175°C). Grease an 8-inch round or square baking pan with butter or non-stick spray, then lightly dust with flour to prevent sticking. This ensures the cake comes out clean and keeps its soft texture.
Step 2
Mix dry ingredients: In a large mixing bowl, sift together the flour, cocoa powder, sugar, baking soda, and salt. Use a whisk to make sure everything is evenly distributed. This step helps avoid lumps and ensures the cocoa flavor spreads evenly throughout the cake.
Step 3
Combine wet ingredients: In a separate bowl, mix the vegetable oil, vanilla extract, white vinegar, and cold water. Stir gently until fully combined. The vinegar reacts with the baking soda to create the “thunder” effect—tiny bubbles that make the cake light and fluffy.
Step 4
Make the batter: Pour the wet ingredients into the dry ingredients. Mix gently with a spatula or spoon until smooth and well incorporated, being careful not to overmix, which can make the cake dense. Fold in chopped walnuts if using, for extra texture and nutty flavor.
Step 5
Bake the cake: Pour the batter into the prepared pan, spreading it evenly. Place in the preheated oven and bake for 35–40 minutes, or until a toothpick inserted in the center comes out clean. The cake should rise nicely and have a soft, springy texture.
Step 6
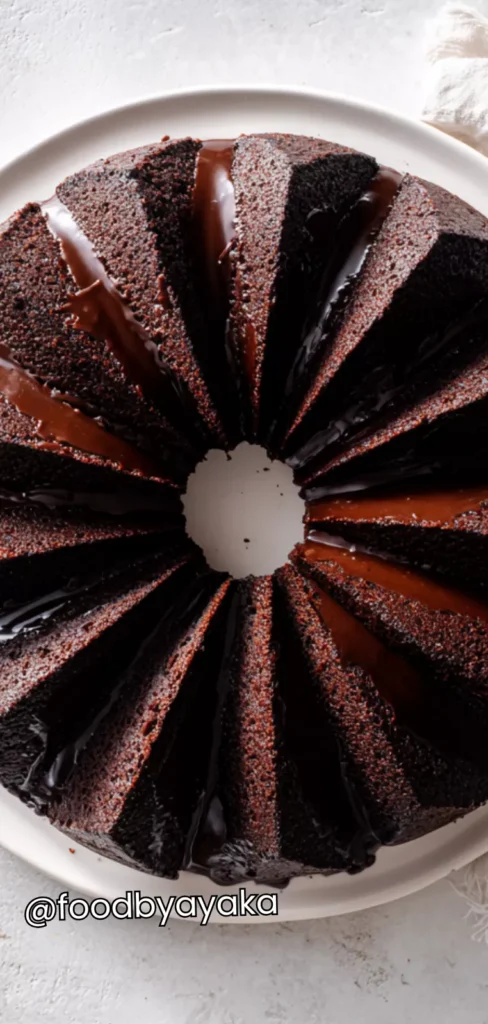
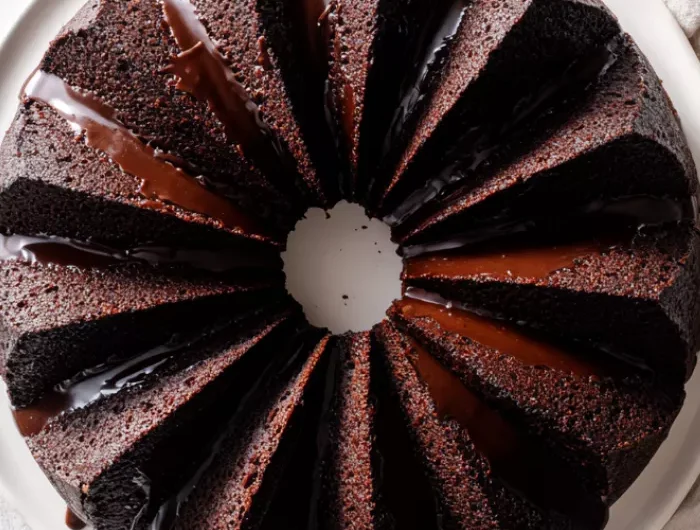
Cool and serve: Remove the cake from the oven and let it cool in the pan for 10 minutes. Transfer to a wire rack if desired, then dust with powdered sugar or drizzle with chocolate glaze for extra indulgence. Slice into squares or wedges and serve warm or at room temperature for the perfect cozy treat.
Tips for Making Perfect Thunder Cake
- Always preheat the oven first. This ensures the cake rises evenly and doesn’t stick. It’s a simple step that makes a big difference.
- Sift your dry ingredients together. Cocoa powder and flour can clump, and sifting gives the batter a smoother texture.
- Mix wet and dry ingredients gently. Overmixing can make the cake dense, so fold until just combined for a soft, fluffy result.
- Use cold water in the batter. It helps activate the baking soda and vinegar, creating those tiny bubbles that give the cake a “thunder” texture.
- Don’t skip greasing the pan. A light butter or oil layer prevents sticking and makes removing the cake much easier.
- Let the cake cool slightly before serving. Cutting it while too hot can make it fall apart, but letting it rest keeps slices neat.
- Taste and adjust toppings. Powdered sugar, chocolate drizzle, or walnuts enhance the flavor and presentation without overwhelming the cake.
Optional Ingredients
- Chopped walnuts for texture
- Mini chocolate chips for extra richness
- Vanilla ice cream for serving
- Fresh berries like raspberries or strawberries
- Chocolate glaze for topping
- A pinch of cinnamon for a warm flavor
How to Serve Thunder Cake
I love serving Thunder Cake straight from the oven when it’s still slightly warm. The aroma fills the kitchen, and the soft texture is perfect with a spoonful of whipped cream or a scoop of ice cream. Dusting it with powdered sugar adds a pretty, homemade touch that makes it look inviting.
I also enjoy pairing it with fresh fruit. Strawberries, raspberries, or even sliced bananas complement the chocolate beautifully. The tartness of the berries balances the cake’s sweetness, giving each bite a bright, flavorful contrast. For family gatherings, I often place it on a decorative platter and drizzle some chocolate glaze over the top, making it look like a special dessert from a café.
Another favorite way I serve Thunder Cake is as an afternoon treat with coffee or tea. I sometimes cut the slices slightly thick so they feel indulgent, and serve them on small plates with a side of whipped cream or a few fresh berries. It’s perfect for cozy chats, celebrating small moments, or simply enjoying a quiet treat at home. Guests always comment on how moist, tender, and light it is, and I love that it’s so easy to make.
Is Thunder Cake Healthy?
Thunder Cake is not a health food, but it’s made with simple pantry ingredients and no excessive butter or eggs. Using vegetable oil instead of butter and skipping heavy frostings makes it a lighter chocolate dessert option. You can also reduce sugar slightly or add walnuts and fruit for a small nutritional boost.
It’s a treat to enjoy in moderation. Each slice gives a rich chocolate experience, and the moist, fluffy texture makes small servings feel satisfying. For a balanced diet, enjoy it as part of a dessert rotation or as a cozy snack with coffee or tea.
Variations and Substitutions
- Gluten-Free Thunder Cake: Substitute all-purpose flour with a gluten-free blend. The texture will remain soft and tender, and the chocolate flavor is just as rich.
- Vegan Thunder Cake: Replace eggs with flax or chia eggs and use plant-based milk. Vegetable oil works fine, and the cake still has that magical “thunder” rise.
- Nutty Thunder Cake: Add chopped almonds or walnuts. This gives a crunchy contrast to the soft cake, perfect for nut lovers.
- Chocolate Chip Thunder Cake: Fold in mini chocolate chips. They melt slightly while baking, adding pockets of gooey chocolate in every slice.
- Coffee-Infused Thunder Cake: Add 1 teaspoon instant coffee to the wet ingredients. It enhances the chocolate flavor with a subtle mocha note.
- Spiced Thunder Cake: Add a pinch of cinnamon or nutmeg. The warm spices give a cozy fall vibe to a classic chocolate cake.
- Marble Thunder Cake: Swirl in some vanilla batter. The cake looks visually stunning and tastes like two flavors in one slice.
- Berry Thunder Cake: Fold in fresh raspberries or blueberries. The tart fruit complements the chocolate and adds natural moisture.
How to Store and Reheat
Store Thunder Cake in an airtight container at room temperature for up to 3 days. This keeps it soft and prevents it from drying out. If storing in the fridge, wrap tightly in plastic wrap to maintain moisture.
To reheat, slice and place a piece on a microwave-safe plate. Heat for 15–20 seconds for a warm, soft texture. You can also warm slices in the oven at 300°F (150°C) for 5–7 minutes. Serve immediately with toppings like ice cream or whipped cream.
Frequently Asked Questions About Thunder Cake
Can I use cocoa powder substitutes?
Yes, you can use either natural cocoa powder or Dutch-processed cocoa. Just keep in mind that Dutch-processed cocoa may need a little adjustment in sugar or acidity to balance the flavor. Either way, the cake will remain rich, chocolatey, and wonderfully moist, perfect for everyday baking or special occasions.
Do I have to use vinegar?
Vinegar reacts with the baking soda to create the “thunder” bubbles that make the cake airy and light. If you don’t have vinegar, lemon juice works as a mild substitute. Using it ensures the texture stays soft and tender without affecting the flavor, so don’t skip this step if you want that signature cake bounce.
Can I make it in a larger pan?
Yes, you can bake it in a larger or smaller pan, but you may need to adjust the baking time slightly. Keep an eye on it and use a toothpick to check doneness. The cake is done when the toothpick comes out clean, and the surface looks springy and slightly set, giving you a perfectly baked, soft chocolate treat every time.
Can I freeze Thunder Cake?
Absolutely! Wrap the cooled cake tightly in foil or plastic wrap and place it in an airtight container before freezing. Thaw it at room temperature before serving, or warm slices briefly in the oven or microwave to restore softness and fresh-baked taste, so it’s just like freshly made.
Thunder Cake Recipe
Course: DessertCuisine: AmericanDifficulty: MediumServings
8
servingsPrep time
20
minutesCooking time
40
minutesDiscover the easy and delicious Thunder Cake recipe! Soft, chocolatey, and perfectly moist, this classic American dessert is perfect for family treats, birthdays, or cozy afternoons.
Ingredients
1 cup all-purpose flour
1 cup granulated sugar
1/2 cup unsweetened cocoa powder
1 teaspoon baking soda
1/2 teaspoon salt
1/2 cup vegetable oil
1 teaspoon vanilla extract
1 tablespoon white vinegar
1 cup cold water
1/2 cup chopped walnuts (optional, for added crunch)
Powdered sugar or chocolate glaze for topping
Directions
- Preheat the oven and prepare pan: Preheat your oven to 350°F (175°C). Grease an 8-inch round or square baking pan with butter or non-stick spray, then lightly dust with flour to prevent sticking. This ensures the cake comes out clean and keeps its soft texture.
- Mix dry ingredients: In a large mixing bowl, sift together the flour, cocoa powder, sugar, baking soda, and salt. Use a whisk to make sure everything is evenly distributed. This step helps avoid lumps and ensures the cocoa flavor spreads evenly throughout the cake.
- Combine wet ingredients: In a separate bowl, mix the vegetable oil, vanilla extract, white vinegar, and cold water. Stir gently until fully combined. The vinegar reacts with the baking soda to create the “thunder” effect—tiny bubbles that make the cake light and fluffy.
- Make the batter: Pour the wet ingredients into the dry ingredients. Mix gently with a spatula or spoon until smooth and well incorporated, being careful not to overmix, which can make the cake dense. Fold in chopped walnuts if using, for extra texture and nutty flavor.
- Bake the cake: Pour the batter into the prepared pan, spreading it evenly. Place in the preheated oven and bake for 35–40 minutes, or until a toothpick inserted in the center comes out clean. The cake should rise nicely and have a soft, springy texture.
- Cool and serve: Remove the cake from the oven and let it cool in the pan for 10 minutes. Transfer to a wire rack if desired, then dust with powdered sugar or drizzle with chocolate glaze for extra indulgence. Slice into squares or wedges and serve warm or at room temperature for the perfect cozy treat.