
Quick & Easy Recipes for Everyday Cooks
Welcome to Food By Ayaka!
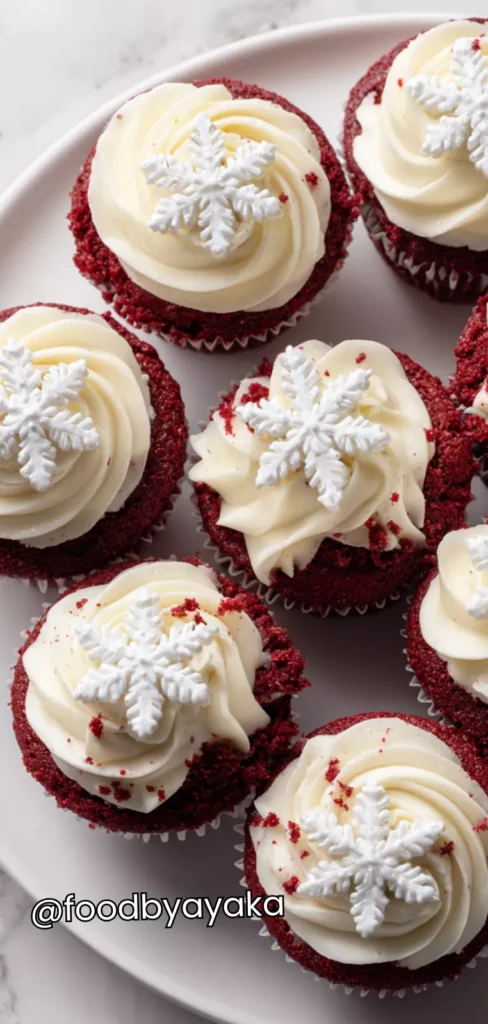
Red Velvet Snowflake Cupcakes Recipe
My kids always ask for these cupcakes when the holidays roll in, but what makes them laugh the most is how the frosting looks like tiny snowstorms sitting on top of each cupcake. Red Velvet Snowflake Cupcakes are one of those desserts that instantly bring a sense of magic to the table. Their absolute favorite part is adding the snowflake sprinkles—sometimes not always perfectly placed, but the joy in their eyes is priceless and makes the kitchen feel warm and full of life. Watching them decorate is messy, yes, but so worth it, and the happiness in the moment is something I treasure deeply.
I have made this recipe so many times that I know exactly what works best. I use gel food coloring because it gives the cupcakes that deep, rich red color without thinning the batter. Always sift your dry ingredients to keep your cupcakes fluffy and soft, and never rush the frosting—letting the cream cheese soften fully helps everything blend smoothly. Little steps like these make the cupcakes taste bakery-quality every time.
You can serve these cupcakes during Christmas parties, winter celebrations, holiday dinners, cozy gatherings, or even as a sweet treat after a simple family meal. Serve them with warm drinks like hot cocoa, some seasonal cookies, also with a light fruit platter to balance the sweetness.
Its Perfect For:
- Holiday parties where everyone expects something beautiful
- Class celebrations or school bake sales
- Family movie nights with a winter theme
- Gifting to neighbors, coworkers, or friends
- A snowy-day treat when you want something comforting
Ingredients
For the Cupcakes
- 1 1/4 cups all-purpose flour
- 1 cup granulated sugar
- 1 tablespoon cocoa powder
- 1/2 teaspoon baking soda
- 1/2 teaspoon salt
- 1/2 cup vegetable oil
- 1/2 cup buttermilk, room temperature
- 1 large egg
- 1 teaspoon vanilla extract
- 1 teaspoon white vinegar
- Red gel food coloring (add until deep red)
For the Cream Cheese Frosting
- 8 oz cream cheese, softened
- 1/2 cup unsalted butter, softened
- 2–2 1/2 cups powdered sugar
- 1 teaspoon vanilla extract
- Snowflake sprinkles or white sugar pearls for decoration
Kitchen Equipment You’ll Need
- Mixing bowls
- Measuring cups and spoons
- Whisk and spatula
- 12-cup muffin pan
- Cupcake liners
- Hand mixer or stand mixer
- Piping bag and tip (optional)
How to Make Red Velvet Snowflake Cupcakes
Step 1
Prepare the Cupcake Batter: Preheat your oven to 350°F (175°C) and line a 12-cup muffin tin with cupcake liners. In a mixing bowl, whisk together flour, sugar, cocoa powder, baking soda, and salt. Set aside. In a separate bowl, whisk the oil, buttermilk, egg, vanilla extract, and vinegar until smooth. Add a generous amount of red gel food coloring and mix well until the color is vibrant and even. Slowly pour the wet mixture into the dry ingredients, stirring gently until everything is just combined. Do not overmix—this keeps the cupcakes soft and fluffy.
Step 2
Bake the Cupcakes: Divide the batter evenly among the cupcake liners, filling each about 2/3 full. Place the tray in the center of the oven and bake for 18–20 minutes, or until a toothpick inserted in the center comes out clean. Allow the cupcakes to cool in the tin for a few minutes before transferring them to a wire rack to cool completely. This helps the texture set properly before frosting.
Step 3
Make the Cream Cheese Frosting: In a large bowl, beat the softened cream cheese and butter together until creamy and smooth. Gradually add powdered sugar, starting with 2 cups and adjusting as needed to reach your preferred consistency. Mix in the vanilla extract. Continue beating until the frosting is fluffy, silky, and pipeable. Chill it briefly if you want a firmer frosting for neater piping.
Step 4
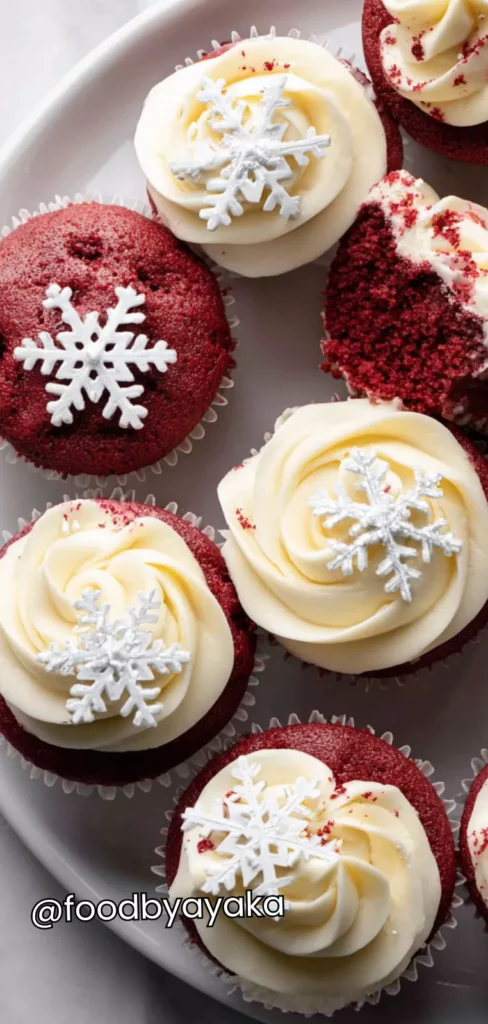
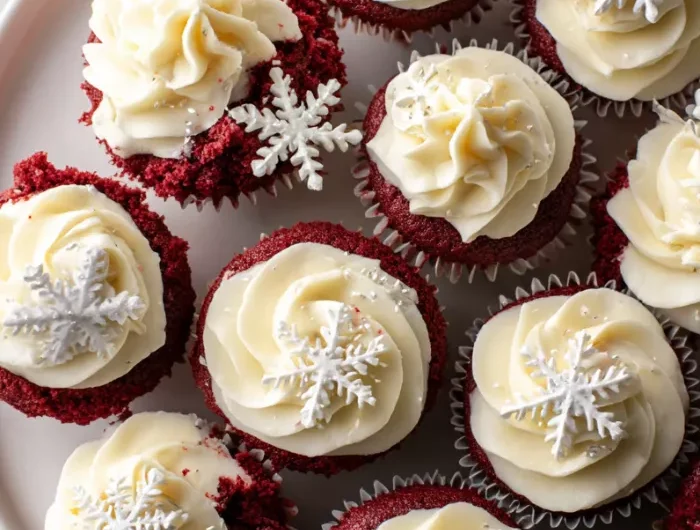
Frost and Decorate: Once the cupcakes are completely cool, use a piping bag fitted with a star tip or round tip to swirl the cream cheese frosting generously on top of each cupcake. To create the “snowflake” effect, sprinkle white sugar pearls or snowflake sprinkles over the frosting while it is still soft so they stick well. You can also dust a little powdered sugar on top for a snowy finish.
Tips for Perfect Red Velvet Snowflake Cupcakes
- Use room-temperature ingredients.
This helps the batter mix more evenly, avoiding lumps and keeping the cupcakes soft. Cold ingredients tend to separate, which can affect the texture. Let everything sit out for about 30 minutes before starting. - Don’t skip the vinegar.
The vinegar reacts with the baking soda to make the cupcakes rise beautifully. It also enhances the red color and gives that classic red velvet flavor. You won’t taste the vinegar at all once baked. - Add the food coloring slowly.
Gel food coloring is strong, so start with a small amount and build up the color. Mix well before deciding whether you need more. This prevents the batter from getting too dark or muddy. - Avoid overmixing the batter.
Once the dry and wet ingredients come together, stop mixing. Overmixing activates the gluten, making cupcakes dense instead of tender. Stir gently just until combined. - Fill each cupcake liner evenly.
About two-thirds full is perfect for a nicely rounded top. If you overfill, the batter may spill over and lose shape. Even filling also helps with uniform baking. - Ensure the cupcakes are fully cooled before frosting.
Warm cupcakes will melt the cream cheese frosting, making it slide off. Give them 20–30 minutes on a cooling rack for the best results. Patience truly pays off here. - Chill the frosting for neater piping.
If the frosting feels too soft, refrigerate it for 10–15 minutes. This makes it easier to pipe clean swirls. A slightly firmer frosting also holds sprinkles better.
Optional Ingredients
- A pinch of cinnamon for warmth
- White chocolate chips inside the batter
- Almond extract for a sweeter aroma
- A bit of orange zest for a fruity holiday twist
- Cocoa nibs for texture
- Shredded coconut for snowy decoration
How to Serve Red Velvet Snowflake Cupcakes
I love serving Red Velvet Snowflake Cupcakes on a clean white platter or a wooden board lined with parchment because the contrast makes the red color shine even more. When the cupcakes sit in a neat row with their snowy frosting, they immediately create a warm holiday atmosphere. I sometimes add tiny fairy lights around the serving area to make the setup extra magical, especially for evening gatherings.
I also enjoy pairing these cupcakes with warm drinks like hot chocolate, cinnamon tea, or a creamy latte. The warmth of the drinks balances the cool, silky frosting beautifully. When I serve them for family gatherings, I place a small bowl of extra snowflake sprinkles next to the platter so guests—especially kids—can decorate their own cupcake before eating it. It turns dessert into a fun activity and makes everyone feel involved.
I prefer offering these cupcakes slightly chilled because the frosting holds its shape better and feels smooth and refreshing. But if you want a softer texture, letting them sit at room temperature for 15 minutes works wonderfully. For parties, I arrange them at different heights using cake stands, which creates a lovely dessert display that becomes the centerpiece of the table. These cupcakes are gorgeous on their own, but they truly shine when served with a touch of creativity and warmth.
Is Red Velvet Snowflake Cupcakes Healthy?
These cupcakes are more of a treat than an everyday snack, but enjoying them in moderation is perfectly fine. They contain sugar, butter, and cream cheese, which make them rich and indulgent. Still, sharing them on special days or during the holidays can bring joy without guilt.
If you want a lighter version, you can reduce the frosting, use less sugar, or make smaller bite-sized cupcakes. You can also pair them with fresh fruit so the sweetness feels more balanced. Small adjustments can make the dessert a bit gentler without losing its charm.
Variations and Substitutions
- Mini Red Velvet Snowflake Bites
Bake the batter in mini cupcake liners for a cute, bite-sized version. Reduce baking time to 12–14 minutes. Perfect for parties with lots of small snacks. - Chocolate Chip Red Velvet Cupcakes
Add a handful of chocolate chips to the batter for a richer, chocolate-forward flavor. The chips melt slightly and create pockets of sweetness. Great for chocolate lovers. - Pink Velvet Cupcakes
Use pink gel coloring instead of red to make a softer, pastel version. This variation is fun for birthdays or Valentine’s Day. The flavor stays the same. - Coconut Snow Cupcakes
Sprinkle shredded coconut on top of the frosting. It gives a snowy, fluffy texture that matches the winter theme beautifully. Works especially well with white liners. - Gluten-Free Red Velvet Cupcakes
Use a gluten-free all-purpose flour blend. Make sure it’s one that includes xanthan gum for better texture. The cupcakes will still be red, soft, and delicious. - Cream-Filled Cupcakes
Cut a small hole in the center of each cupcake and fill it with extra cream cheese frosting. This makes them richer and extra special. Kids love this surprise inside. - Lemon-Frosted Red Velvet
Replace vanilla in the frosting with lemon zest and a little lemon juice. The bright, fresh flavor balances the sweetness. It also adds a nice winter citrus twist. - Nut-Topped Cupcakes
Add crushed pecans or walnuts on top of the frosting. They add texture and a light nutty aroma. Perfect for adults who prefer less sweetness.
How to Store, How to Reheat
To store the cupcakes, place them in an airtight container and keep them in the refrigerator for up to four days. Since the frosting contains cream cheese, it’s important to keep them chilled to maintain freshness and safety. You can also store unfrosted cupcakes at room temperature for two days.
If you want to reheat them slightly, warm the unfrosted cupcakes in the microwave for about 8–10 seconds. Frosted cupcakes should not be reheated, but you can let them sit at room temperature for 15 minutes before serving so they soften gently without melting.
Frequently Asked Questions About Red Velvet Snowflake Cupcakes
Can I make these cupcakes ahead of time?
Yes, you can bake the cupcakes one day in advance without any problem. Store them in an airtight container at room temperature if they’re unfrosted. If they are already frosted, keep them refrigerated. When you’re ready to serve, you can freshly pipe additional frosting or add sprinkles for a just-made look. Preparing ahead is great when you’re hosting or need to save time.
Can I freeze Red Velvet Snowflake Cupcakes?
Absolutely, but it’s best to freeze them unfrosted. Wrap each cupcake tightly in plastic wrap, then place them in a freezer-safe bag. They can stay frozen for up to two months. When ready to serve, let them thaw at room temperature and frost them once completely soft again. Frozen cupcakes still taste delicious when stored properly.
Can I use liquid food coloring instead of gel?
Yes, but you’ll need quite a bit more to achieve the same deep red color. Be careful not to add too much, as liquid color can water down the batter and affect how the cupcakes rise. Gel coloring is recommended because it keeps the batter thick and gives the cupcakes that bold, beautiful red velvet look with only a few drops.
Why do my cupcakes sink in the middle?
Cupcakes usually sink due to overmixing, underbaking, or opening the oven too early. Make sure to mix the batter gently and only until combined. Also check your baking soda’s expiration date since expired leaveners won’t help the cupcakes rise properly. Bake them without opening the oven door so the heat remains consistent. A stable temperature helps them bake evenly.
Red Velvet Snowflake Cupcakes Recipe
Course: DessertCuisine: AmericanDifficulty: EasyServings
12
servingsPrep time
20
minutesCooking time
20
minutesMake festive Red Velvet Snowflake Cupcakes with soft red velvet bases and creamy snow-like frosting. Perfect for holidays, parties, or family treats, this easy recipe includes tips, variations, and serving ideas.
Ingredients
- For the Cupcakes:
1 1/4 cups all-purpose flour
1 cup granulated sugar
1 tablespoon cocoa powder
1/2 teaspoon baking soda
1/2 teaspoon salt
1/2 cup vegetable oil
1/2 cup buttermilk, room temperature
1 large egg
1 teaspoon vanilla extract
1 teaspoon white vinegar
Red gel food coloring (add until deep red)
- For the Cream Cheese Frosting:
8 oz cream cheese, softened
1/2 cup unsalted butter, softened
2–2 1/2 cups powdered sugar
1 teaspoon vanilla extract
Snowflake sprinkles or white sugar pearls for decoration
Directions
- Prepare the Cupcake Batter: Preheat your oven to 350°F (175°C) and line a 12-cup muffin tin with cupcake liners. In a mixing bowl, whisk together flour, sugar, cocoa powder, baking soda, and salt. Set aside. In a separate bowl, whisk the oil, buttermilk, egg, vanilla extract, and vinegar until smooth. Add a generous amount of red gel food coloring and mix well until the color is vibrant and even. Slowly pour the wet mixture into the dry ingredients, stirring gently until everything is just combined. Do not overmix—this keeps the cupcakes soft and fluffy.
- Bake the Cupcakes: Divide the batter evenly among the cupcake liners, filling each about 2/3 full. Place the tray in the center of the oven and bake for 18–20 minutes, or until a toothpick inserted in the center comes out clean. Allow the cupcakes to cool in the tin for a few minutes before transferring them to a wire rack to cool completely. This helps the texture set properly before frosting.
- Make the Cream Cheese Frosting: In a large bowl, beat the softened cream cheese and butter together until creamy and smooth. Gradually add powdered sugar, starting with 2 cups and adjusting as needed to reach your preferred consistency. Mix in the vanilla extract. Continue beating until the frosting is fluffy, silky, and pipeable. Chill it briefly if you want a firmer frosting for neater piping.
- Frost and Decorate: Once the cupcakes are completely cool, use a piping bag fitted with a star tip or round tip to swirl the cream cheese frosting generously on top of each cupcake. To create the “snowflake” effect, sprinkle white sugar pearls or snowflake sprinkles over the frosting while it is still soft so they stick well. You can also dust a little powdered sugar on top for a snowy finish.