
Quick & Easy Recipes for Everyday Cooks
Welcome to Food By Ayaka!
Quick & Easy Fall Snack Recipes
Making delicious fall snacks in this cozy season is one of my absolute favorite things to do! There’s something so special about the smell of cinnamon, pumpkin spice, and maple filling up my kitchen when the weather gets cooler.
So I decided to share with you my collection of 15 amazing fall snack recipes that will satisfy all your seasonal cravings and make your home smell like autumn.
Caramel Apple Slices
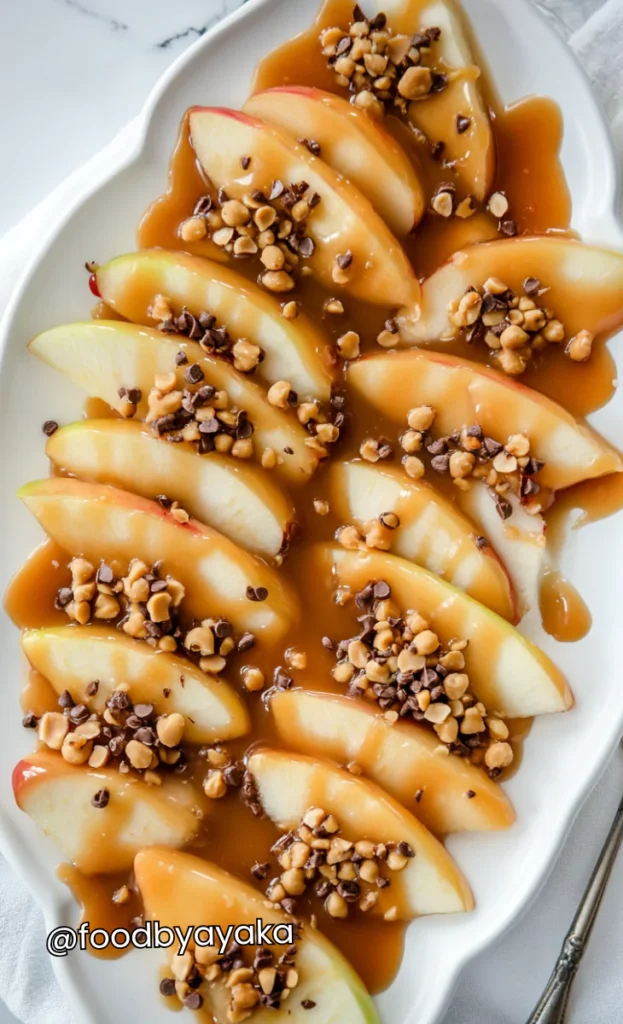
These caramel apple slices are the perfect fall treat that’s so much easier to eat than whole caramel apples! You get all the sweet, gooey caramel goodness without the sticky mess all over your face.
Time: 20 minutes | Serves: 6
Ingredients
- 4 large Granny Smith apples, cored and sliced
- 1 cup caramel candies, unwrapped
- 2 tablespoons heavy cream
- 1 teaspoon vanilla extract
- 1/2 cup chopped peanuts (optional)
- 1/4 cup mini chocolate chips (optional)
- 1 tablespoon lemon juice
- Pinch of sea salt
Instructions
- Wash and core your apples, then slice them into thick wedges about 1/2 inch wide. Toss the apple slices with lemon juice to prevent them from turning brown.
- Arrange apple slices on a parchment-lined baking sheet or serving platter, making sure they’re not overlapping so the caramel can coat them evenly.
- In a microwave-safe bowl, combine unwrapped caramel candies and heavy cream. Microwave in 30-second intervals, stirring between each, until smooth and creamy.
- Stir vanilla extract and a pinch of sea salt into the melted caramel mixture. The caramel should be smooth and pourable but not too thin.
- Drizzle the warm caramel over the apple slices using a spoon, or dip each slice individually for more coverage. Work quickly before the caramel hardens.
- If using toppings, sprinkle chopped peanuts and mini chocolate chips over the caramel while it’s still warm so they stick. Let set for 10 minutes before serving!
Pumpkin Spice Latte
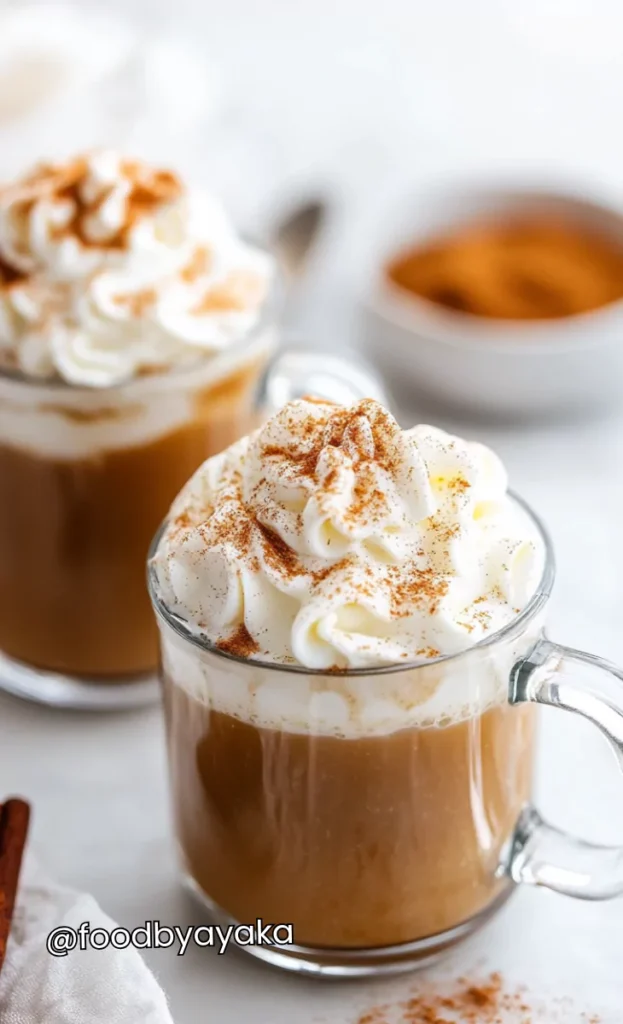
This homemade pumpkin spice latte tastes just like the one from your favorite coffee shop but costs way less to make! It’s creamy, spicy, and has that perfect pumpkin flavor that makes you feel all cozy inside. The best part is you can make it exactly how you like it – stronger coffee, more spice, or extra whipped cream. It’s the ultimate fall drink that will warm you up on chilly mornings!
Time: 10 minutes | Serves: 2
Ingredients
- 2 cups strong brewed coffee
- 1/2 cup whole milk
- 1/4 cup pumpkin puree
- 2 tablespoons sugar
- 1/2 teaspoon vanilla extract
- 1/2 teaspoon pumpkin pie spice
- 1/4 teaspoon cinnamon
- Whipped cream for topping
- Extra cinnamon for dusting
Instructions
- Brew your coffee extra strong since you’ll be adding milk and other ingredients that will dilute the coffee flavor. Use about 1.5 times your normal amount of coffee grounds.
- In a small saucepan, whisk together milk, pumpkin puree, sugar, vanilla, pumpkin pie spice, and cinnamon over medium heat until steaming but not boiling.
- Use a whisk or milk frother to create foam in the milk mixture. If you don’t have a frother, whisk vigorously by hand for about 30 seconds.
- Pour the hot coffee into two large mugs, filling each about 3/4 full to leave room for the milk mixture and whipped cream.
- Slowly pour the spiced milk mixture into each mug, stirring gently to combine with the coffee. The mixture should be smooth and creamy.
- Top each latte with a generous dollop of whipped cream and dust with extra cinnamon. Serve immediately while hot and enjoy your cozy fall moment!
Maple Glazed Nuts
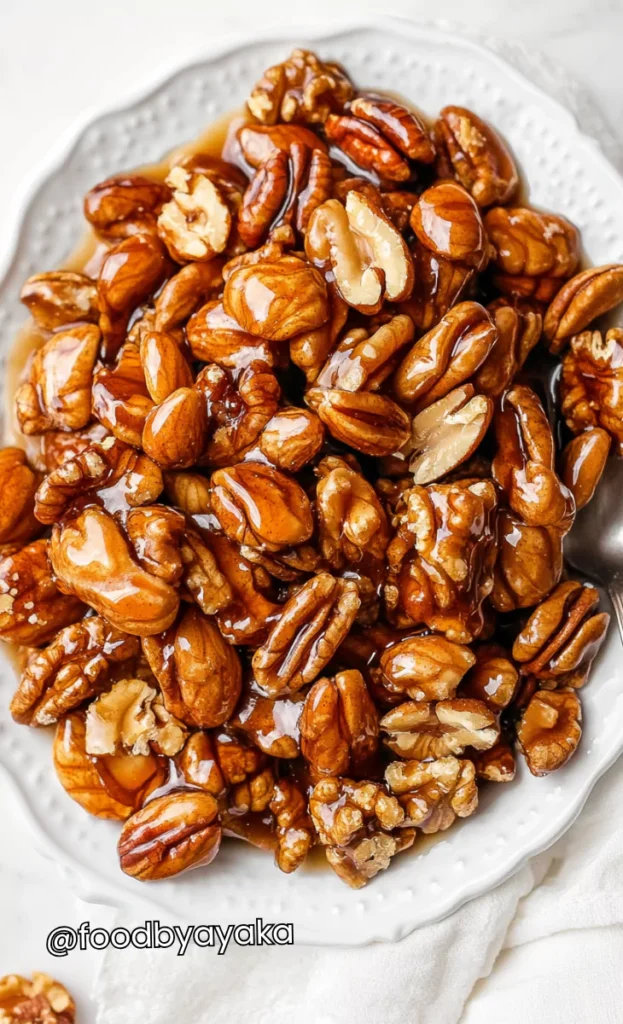
These maple glazed nuts are sweet, crunchy, and absolutely addictive! They’re perfect for snacking, adding to salads, or giving as gifts during the fall season. The maple syrup creates a beautiful glossy coating that hardens into the perfect crunchy shell. Every bite has that warm maple flavor that tastes like autumn, and they make your whole kitchen smell amazing while they’re baking!
Time: 25 minutes | Serves: 8
Ingredients
- 2 cups mixed nuts (walnuts, pecans, almonds)
- 1/3 cup pure maple syrup
- 2 tablespoons brown sugar
- 1 tablespoon butter, melted
- 1/2 teaspoon cinnamon
- 1/4 teaspoon ground ginger
- 1/4 teaspoon salt
- 1/8 teaspoon cayenne pepper (optional)
Instructions
- Preheat your oven to 350°F and line a baking sheet with parchment paper. This prevents the nuts from sticking and makes cleanup super easy.
- In a large bowl, whisk together maple syrup, brown sugar, melted butter, cinnamon, ginger, salt, and cayenne pepper if using until smooth and well combined.
- Add the mixed nuts to the maple mixture and toss until every nut is completely coated with the sweet, spicy glaze. Make sure no nut is left behind!
- Spread the glazed nuts in a single layer on your prepared baking sheet, making sure they’re not overlapping so they bake evenly.
- Bake for 12-15 minutes, stirring once halfway through, until the nuts are golden brown and the glaze is bubbling and caramelized.
- Let the nuts cool completely on the baking sheet – they’ll continue to crisp up as they cool. Store in an airtight container for up to one week!
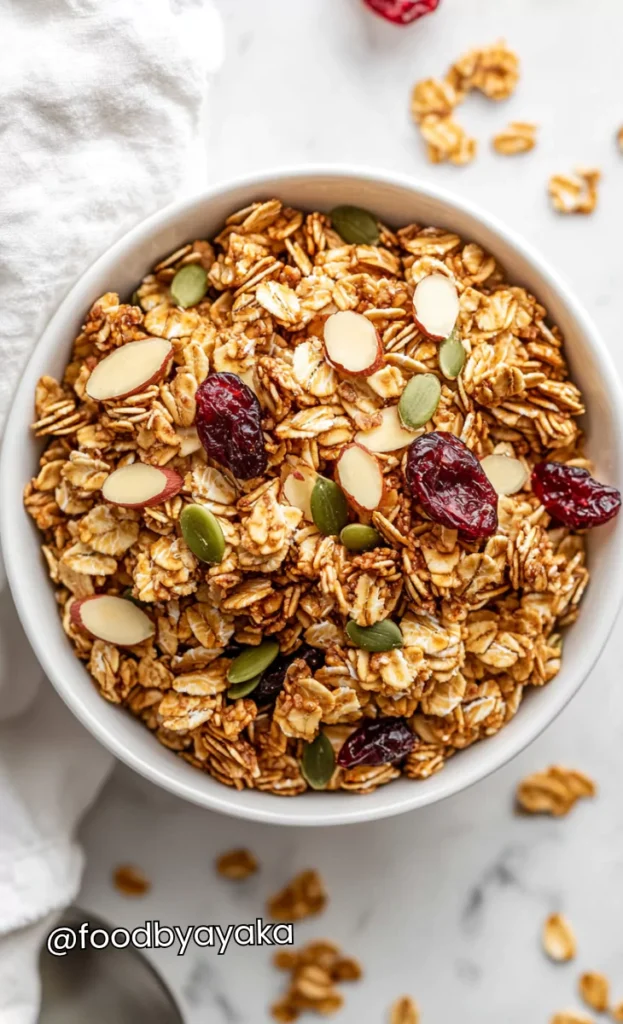
Maple Pecan Granola
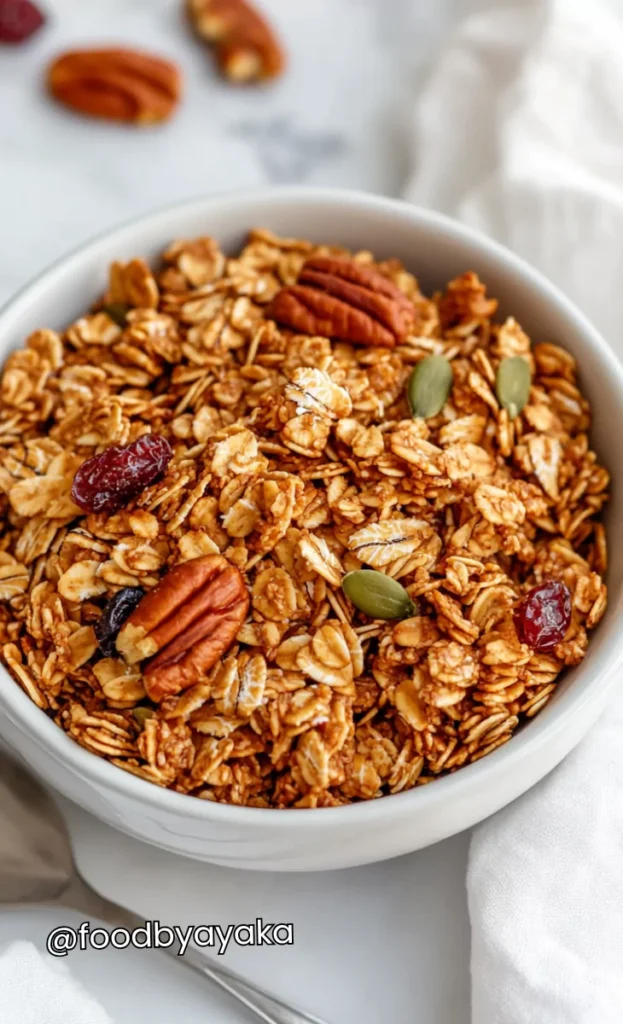
This homemade maple pecan granola is so much better than store-bought and fills your house with the most amazing smell! It’s perfectly sweet, crunchy, and loaded with pecans that taste like fall in every bite. You can eat it with milk for breakfast, sprinkle it on yogurt, or just grab handfuls as a snack. Once you make this granola, you’ll never want to buy it from the store again!
Time: 45 minutes | Serves: 10
Ingredients
- 3 cups old-fashioned oats
- 1 1/2 cups pecans, roughly chopped
- 1/2 cup pumpkin seeds
- 1/3 cup pure maple syrup
- 1/4 cup brown sugar
- 1/4 cup melted coconut oil
- 1 teaspoon vanilla extract
- 1 teaspoon cinnamon
- 1/2 teaspoon salt
- 1/2 cup dried cranberries
Instructions
- Preheat your oven to 300°F and line a large baking sheet with parchment paper. Lower temperature helps the granola bake evenly without burning.
- In a large bowl, combine oats, chopped pecans, pumpkin seeds, cinnamon, and salt. Mix everything together so the spices are evenly distributed.
- In a separate bowl, whisk together maple syrup, brown sugar, melted coconut oil, and vanilla extract until smooth and well combined.
- Pour the wet ingredients over the dry ingredients and stir until everything is evenly coated. Every oat and nut should be glistening with the maple mixture.
- Spread the granola mixture evenly on your prepared baking sheet and bake for 25-30 minutes, stirring every 10 minutes to prevent burning.
- Remove from oven when golden brown and let cool completely – it will get crunchier as it cools. Stir in dried cranberries once cooled and store in an airtight container!
Apple Cider Donut Holes
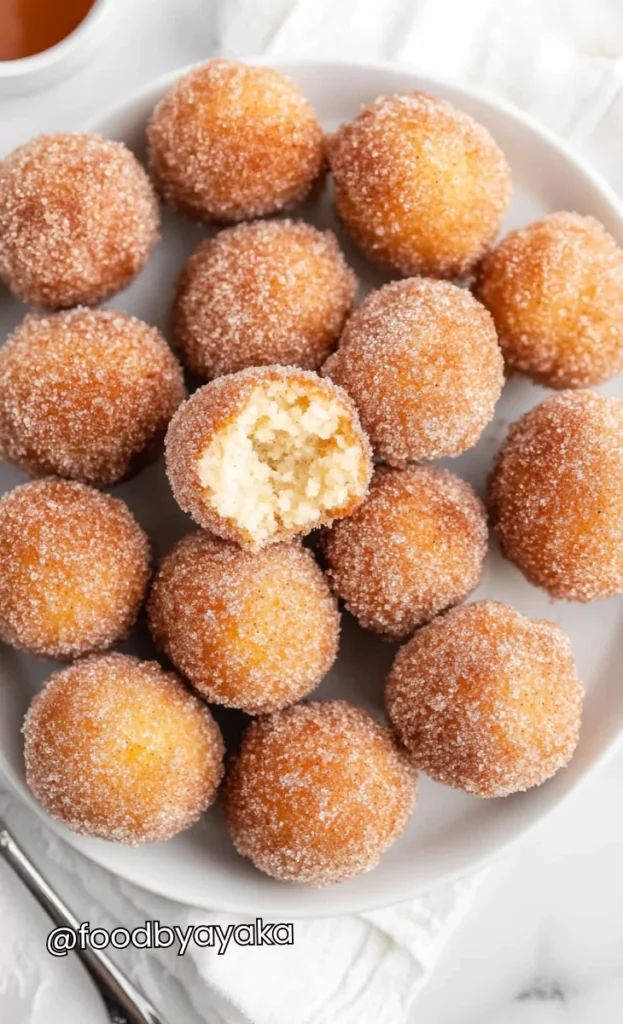
These apple cider donut holes taste just like the ones from the apple orchard but you can make them right at home! They’re soft, fluffy, and packed with apple cider flavor that tastes like fall in every bite. The cinnamon sugar coating makes them extra special and irresistible. These little treats are perfect for breakfast, dessert, or anytime you want something sweet and cozy!
Time: 30 minutes | Serves: 6
Ingredients
- 1 cup apple cider
- 2 cups all-purpose flour
- 1/2 cup sugar
- 2 teaspoons baking powder
- 1 teaspoon cinnamon
- 1/2 teaspoon salt
- 1/4 teaspoon nutmeg
- 1/3 cup melted butter
- 1 large egg
- 1/2 cup milk
- Oil for frying
- 1/2 cup sugar mixed with 1 tablespoon cinnamon for coating
Instructions
- In a small saucepan, boil apple cider over medium-high heat until it reduces to about 1/4 cup, which concentrates the apple flavor. Let it cool completely.
- In a large bowl, whisk together flour, sugar, baking powder, cinnamon, salt, and nutmeg until well combined and no lumps remain.
- In another bowl, mix the cooled apple cider reduction, melted butter, egg, and milk until smooth and well combined.
- Pour the wet ingredients into the dry ingredients and stir just until combined – don’t overmix or the donuts will be tough. The batter should be thick but scoopable.
- Heat oil to 375°F in a deep pot or fryer. Use a small cookie scoop to drop balls of batter into the hot oil, frying for 2-3 minutes until golden brown.
- Remove donut holes with a slotted spoon and immediately roll in cinnamon sugar while still warm. Serve hot for the best flavor and texture!
Pumpkin Chocolate Chip Muffins
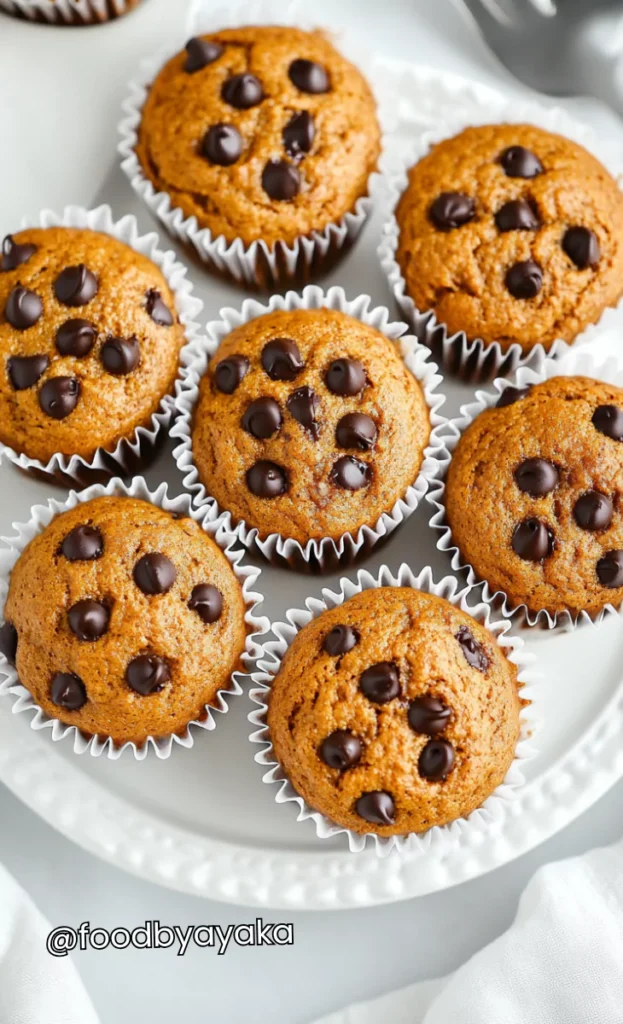
These pumpkin chocolate chip muffins are moist, fluffy, and taste like fall heaven! The pumpkin makes them incredibly tender and adds that perfect autumn flavor, while the chocolate chips make every bite extra special. They’re perfect for breakfast, snack time, or even dessert with a cup of coffee. These muffins are so good that people always ask for the recipe when they try them!
Time: 30 minutes | Serves: 12
Ingredients
- 1 3/4 cups all-purpose flour
- 1 teaspoon baking soda
- 1/2 teaspoon salt
- 1 teaspoon cinnamon
- 1/2 teaspoon nutmeg
- 1/4 teaspoon ground cloves
- 1 1/2 cups sugar
- 1/2 cup vegetable oil
- 2 large eggs
- 1 cup pumpkin puree
- 1/3 cup water
- 1 cup chocolate chips
Instructions
- Preheat your oven to 400°F and line a 12-cup muffin tin with paper liners or grease with butter. This prevents sticking and makes removal easy.
- In a medium bowl, whisk together flour, baking soda, salt, cinnamon, nutmeg, and cloves until well combined and no lumps remain.
- In a large bowl, beat together sugar, oil, and eggs until smooth and creamy. Add pumpkin puree and water, mixing until well combined.
- Gradually fold the dry ingredients into the wet ingredients, stirring just until combined. Don’t overmix or your muffins will be dense and tough.
- Gently fold in chocolate chips, making sure they’re evenly distributed throughout the batter so every muffin gets plenty of chocolate.
- Fill muffin cups about 2/3 full with batter and bake for 18-20 minutes until a toothpick inserted in the center comes out clean. Cool in pan for 5 minutes before removing!
Pumpkin Spice Popcorn
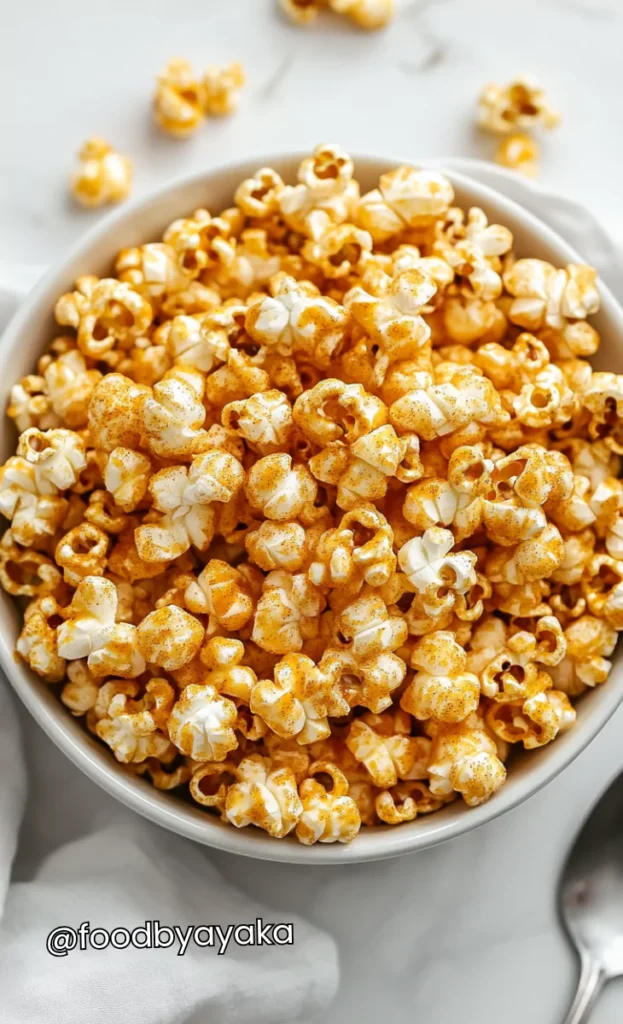
This pumpkin spice popcorn is the perfect healthy fall snack that’s sweet, salty, and totally addictive! It’s so much better than regular popcorn and has all those warm fall spices that make you feel cozy. The best part is it’s ready in just minutes and makes your whole house smell like autumn. It’s great for movie nights, parties, or when you want a guilt-free snack that tastes amazing!
Time: 10 minutes | Serves: 6
Ingredients
- 1/2 cup popcorn kernels
- 3 tablespoons coconut oil
- 3 tablespoons butter, melted
- 2 tablespoons brown sugar
- 1 teaspoon pumpkin pie spice
- 1/2 teaspoon cinnamon
- 1/2 teaspoon salt
- 1/4 teaspoon vanilla extract
Instructions
- Heat coconut oil in a large pot with a tight-fitting lid over medium-high heat. Add a few popcorn kernels and wait for them to pop to test the temperature.
- Once the test kernels pop, add the remaining kernels, cover the pot, and shake it gently to coat all kernels with oil. Keep the pot moving!
- Listen for the popping to slow down to about 2-3 seconds between pops, then remove from heat and let it sit for 30 seconds to finish popping.
- While popcorn pops, mix melted butter, brown sugar, pumpkin pie spice, cinnamon, salt, and vanilla in a small bowl until smooth and well combined.
- Pour the spiced butter mixture over the hot popcorn and toss with clean hands or a large spoon until every kernel is coated with the delicious mixture.
- Spread the popcorn on a parchment-lined baking sheet to cool and crisp up for about 5 minutes before serving. Store leftovers in an airtight container!
Apple Chips with Cinnamon
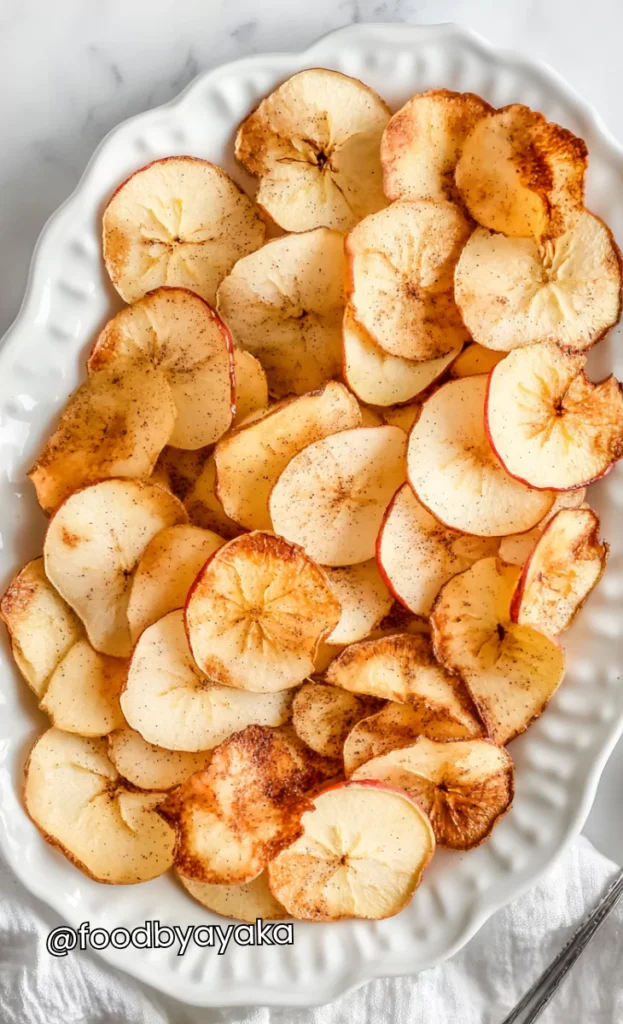
These crispy apple chips are a healthy and delicious fall snack that tastes like apple pie without all the calories! They’re naturally sweet, perfectly spiced with cinnamon, and so satisfying to munch on. The slow baking process makes them crispy and concentrates all the apple flavor into every bite. They’re perfect for lunchboxes, after-school snacks, or anytime you want something sweet but healthy!
Time: 2 hours 30 minutes | Serves: 4
Ingredients
- 3 large apples (Honeycrisp or Gala work best)
- 2 teaspoons ground cinnamon
- 1 tablespoon sugar (optional)
- 1/4 teaspoon nutmeg
- Pinch of salt
Instructions
- Preheat your oven to 200°F and line two large baking sheets with parchment paper. The low temperature is key to getting crispy chips without burning.
- Wash and core the apples, then slice them as thinly as possible using a mandoline or very sharp knife. Aim for 1/8 inch thick slices for even cooking.
- Arrange apple slices in a single layer on the prepared baking sheets, making sure they don’t overlap. Overlapping slices won’t get crispy evenly.
- In a small bowl, mix cinnamon, sugar if using, nutmeg, and salt. Sprinkle this mixture evenly over all the apple slices on both baking sheets.
- Bake for 2-2.5 hours, flipping the slices every 30 minutes and rotating the baking sheets for even cooking. They’re done when crispy and no longer flexible.
- Let the apple chips cool completely on the baking sheets – they’ll continue to crisp up as they cool. Store in an airtight container for up to one week!
Pumpkin Bread Mini Loaves
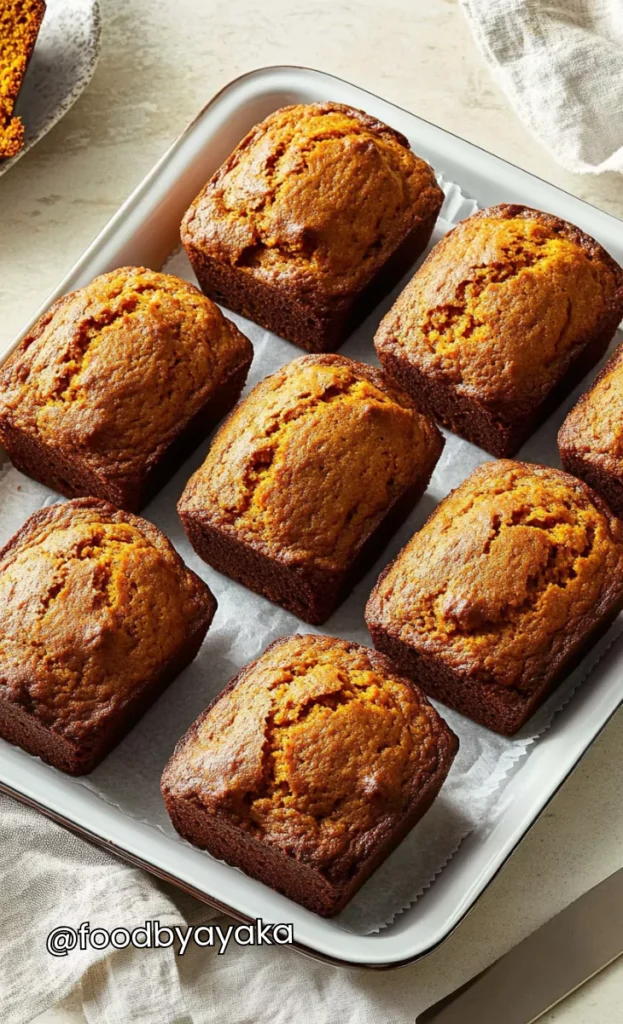
These adorable pumpkin bread mini loaves are perfect for fall gift-giving or just treating yourself! They’re moist, spiced perfectly, and have that classic pumpkin bread flavor that everyone loves. The mini size makes them so cute and perfect for sharing with neighbors, teachers, or coworkers. Each little loaf is like a personal-sized slice of autumn happiness that will make anyone’s day better!
Time: 1 hour | Serves: 8
Ingredients
- 1 3/4 cups all-purpose flour
- 1 teaspoon baking soda
- 1/2 teaspoon salt
- 1 teaspoon cinnamon
- 1/2 teaspoon nutmeg
- 1/4 teaspoon ground cloves
- 1/4 teaspoon ground ginger
- 1 1/2 cups sugar
- 1/2 cup vegetable oil
- 2 large eggs
- 1 cup pumpkin puree
- 1/3 cup water
Instructions
- Preheat your oven to 350°F and grease 8 mini loaf pans with butter or cooking spray. You can also use paper liners for easy removal and gift-giving.
- In a medium bowl, whisk together flour, baking soda, salt, cinnamon, nutmeg, cloves, and ginger until well combined and evenly distributed.
- In a large bowl, beat together sugar, oil, and eggs until smooth and creamy. Add pumpkin puree and water, mixing until well combined and smooth.
- Gradually fold the dry ingredients into the wet ingredients, stirring just until combined. Don’t overmix or the bread will be dense instead of tender.
- Divide the batter evenly among the prepared mini loaf pans, filling each about 2/3 full to allow room for rising during baking.
- Bake for 35-40 minutes until a toothpick inserted in the center comes out clean. Cool in pans for 10 minutes before removing to wire racks!
Cinnamon Sugar Roasted Almonds
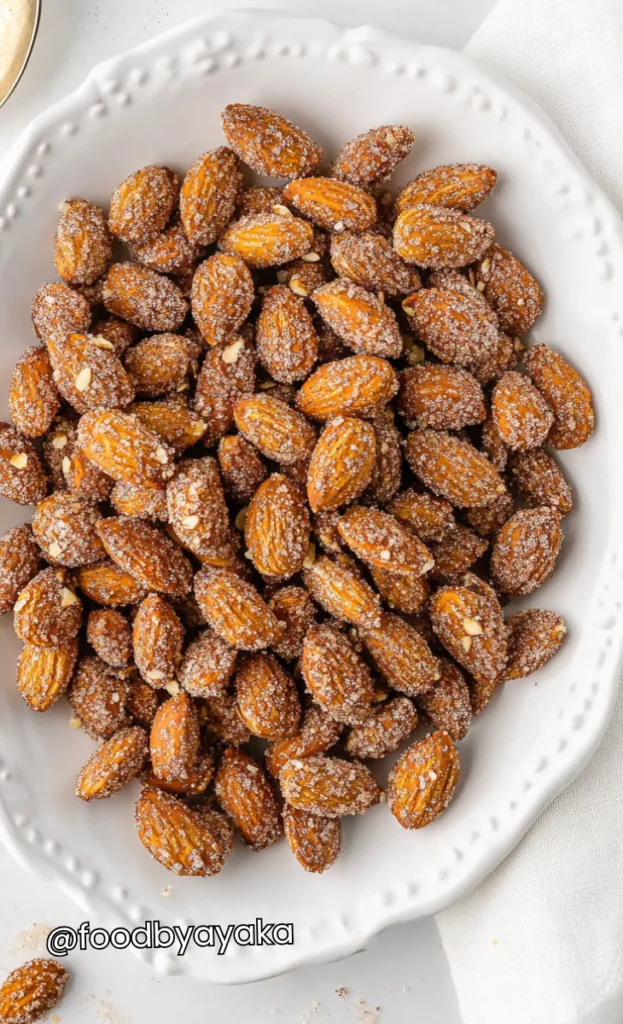
These cinnamon sugar roasted almonds are sweet, crunchy, and smell absolutely incredible while they’re baking! They taste just like the ones you get at the fair but you can make them at home anytime. The almonds get perfectly toasted and coated with a sweet cinnamon sugar mixture that’s totally irresistible. They’re great for snacking, adding to trail mix, or giving as homemade gifts during the fall season!
Time: 20 minutes | Serves: 6
Ingredients
- 2 cups raw almonds
- 1 egg white
- 1 tablespoon water
- 1/2 cup sugar
- 1 teaspoon cinnamon
- 1/2 teaspoon vanilla extract
- 1/4 teaspoon salt
Instructions
- Preheat your oven to 300°F and line a large baking sheet with parchment paper. The lower temperature helps the almonds cook evenly without burning.
- In a large bowl, whisk the egg white and water together until frothy and slightly foamy. This helps the sugar mixture stick to the almonds perfectly.
- Add the raw almonds to the egg white mixture and toss until every almond is completely coated with the foamy mixture. Make sure no almond is left dry.
- In a small bowl, mix together sugar, cinnamon, vanilla extract, and salt until well combined and no lumps remain.
- Sprinkle the cinnamon sugar mixture over the wet almonds and toss until every almond is evenly coated with the sweet, spicy mixture.
- Spread almonds in a single layer on the prepared baking sheet and bake for 15-18 minutes, stirring once halfway through, until golden and fragrant. Cool completely before storing!
Sweet Potato Fries with Spicy Dip
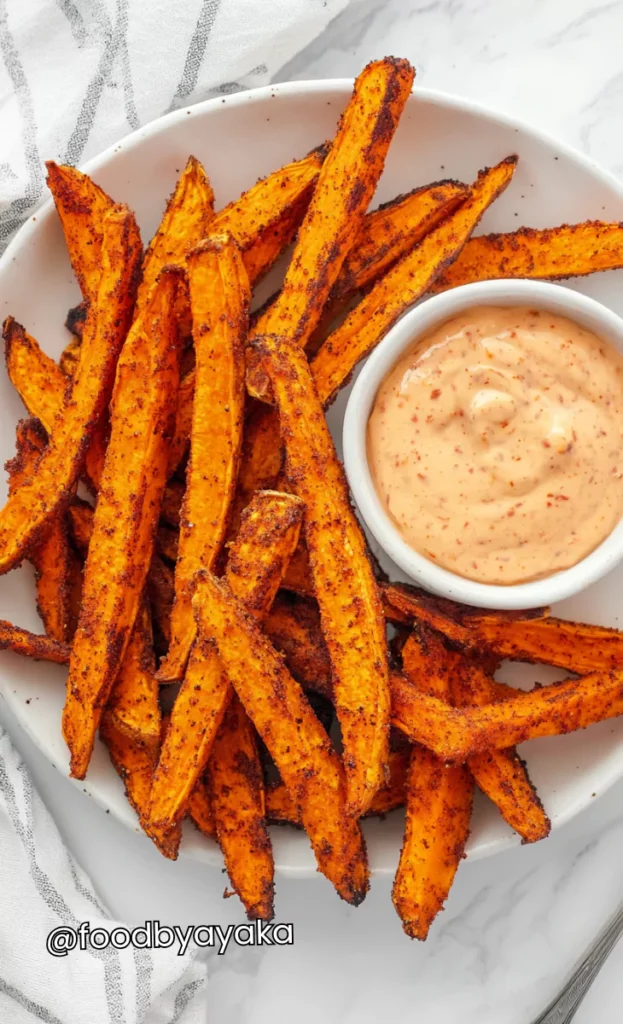
These crispy sweet potato fries are so much better than regular fries and paired with a spicy dip, they’re absolutely amazing! The natural sweetness of the potatoes gets caramelized in the oven, creating crispy edges and tender centers. The spicy dip adds just the right kick to balance out the sweetness. These fries are perfect as a healthy snack or side dish that everyone will love!
Time: 45 minutes | Serves: 4
Ingredients
- 3 large sweet potatoes, cut into fries
- 3 tablespoons olive oil
- 1 teaspoon paprika
- 1/2 teaspoon garlic powder
- 1/2 teaspoon salt
- 1/4 teaspoon black pepper
- For the dip: 1/2 cup mayonnaise
- 2 tablespoons sriracha sauce
- 1 tablespoon honey
- 1 teaspoon lime juice
- 1/4 teaspoon garlic powder
Instructions
- Preheat your oven to 425°F and line a large baking sheet with parchment paper. Cut sweet potatoes into evenly-sized fries for consistent cooking.
- Soak the cut sweet potato fries in cold water for 30 minutes to remove excess starch, then pat them completely dry with paper towels. This step is crucial for crispiness!
- In a large bowl, toss the dried fries with olive oil, paprika, garlic powder, salt, and pepper until every fry is evenly coated with oil and spices.
- Arrange fries in a single layer on the prepared baking sheet, making sure they don’t touch each other. Overcrowding will make them steam instead of crisp.
- Bake for 25-30 minutes, flipping once halfway through, until golden brown and crispy on the edges. The fries should be tender inside and crispy outside.
- While fries bake, make the spicy dip by whisking together mayonnaise, sriracha, honey, lime juice, and garlic powder until smooth. Serve fries hot with the dip!
Pumpkin Cheesecake Dip
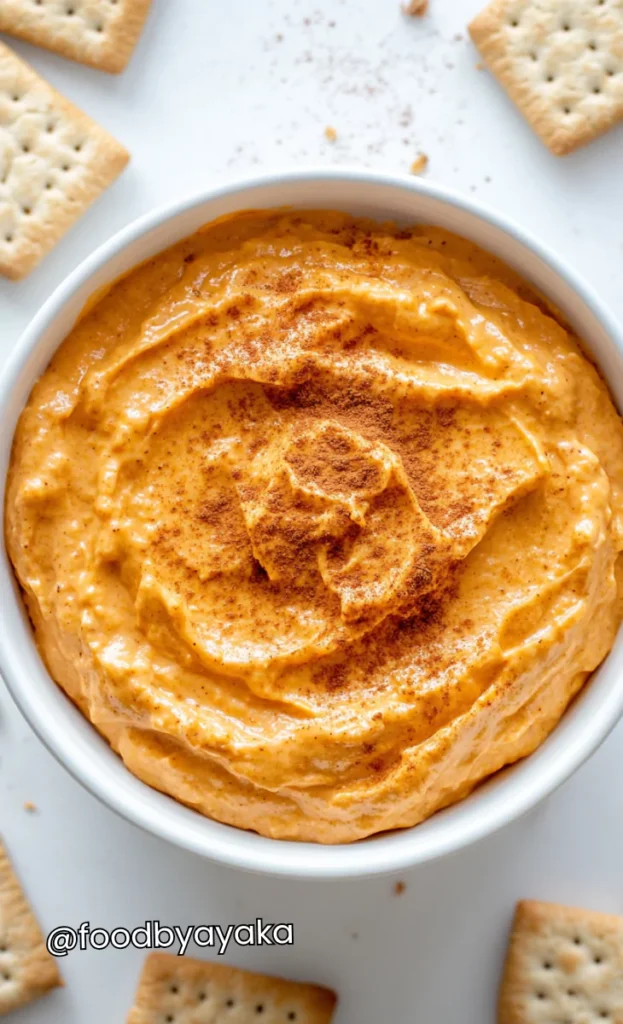
This pumpkin cheesecake dip tastes just like pumpkin cheesecake but in an easy, no-bake dip form! It’s creamy, sweet, and has all those perfect fall spices that make you feel cozy. The best part is it takes only minutes to make and everyone always goes crazy for it. Serve it with graham crackers, apple slices, or gingersnaps for the ultimate fall party treat!
Time: 15 minutes + chilling | Serves: 8
Ingredients
- 8 oz cream cheese, softened
- 1 cup pumpkin puree
- 1/2 cup powdered sugar
- 1/2 cup brown sugar
- 1 teaspoon vanilla extract
- 1 teaspoon pumpkin pie spice
- 1/2 teaspoon cinnamon
- 1 cup heavy cream
- Graham crackers, apple slices, or gingersnaps for dipping
Instructions
- Make sure your cream cheese is completely softened to room temperature – this prevents lumps and makes the dip smooth and creamy. Leave it out for about an hour before making.
- In a large bowl, beat the softened cream cheese until smooth and fluffy, about 2-3 minutes with an electric mixer on medium speed.
- Add pumpkin puree, powdered sugar, brown sugar, vanilla extract, pumpkin pie spice, and cinnamon. Beat until well combined and smooth with no lumps.
- In a separate bowl, whip the heavy cream until soft peaks form – don’t overwhip or it will become butter! The cream should be fluffy but not stiff.
- Gently fold the whipped cream into the pumpkin mixture using a spatula, being careful not to deflate the cream. Fold just until combined and fluffy.
- Transfer to a serving bowl and refrigerate for at least 2 hours to set up and let flavors meld. Serve chilled with your favorite dippers – it’s like fall in a bowl!
Cranberry Brie Bites

These elegant cranberry brie bites are perfect for fall entertaining and look so fancy but are actually super easy to make! The buttery pastry holds creamy melted brie and sweet-tart cranberries that taste amazing together. They’re the kind of appetizer that makes people think you’re a gourmet cook, but they’re ready in just 20 minutes. Everyone always asks for the recipe when they try these little bites of heaven!
Time: 25 minutes | Serves: 12
Ingredients
- 1 package frozen puff pastry, thawed
- 8 oz brie cheese, rind removed and cubed
- 1/2 cup dried cranberries
- 1/4 cup chopped walnuts
- 2 tablespoons honey
- 1 egg, beaten
- 1 tablespoon fresh thyme leaves
- 1/4 teaspoon black pepper
Instructions
- Preheat your oven to 400°F and grease a 24-cup mini muffin tin. The puff pastry will puff up beautifully in these small cups to create perfect little bites.
- Roll out the thawed puff pastry on a lightly floured surface and cut into 24 squares that will fit into your mini muffin cups.
- Gently press each pastry square into a muffin cup, creating little pastry cups. The edges should come up the sides slightly to hold the filling.
- In a small bowl, mix together cubed brie, dried cranberries, chopped walnuts, honey, thyme leaves, and black pepper until well combined.
- Divide the brie mixture evenly among the pastry cups, filling each about 3/4 full. Brush the pastry edges with beaten egg for a golden finish.
- Bake for 12-15 minutes until the pastry is golden brown and puffed, and the brie is melted and bubbly. Serve warm for the best flavor and texture!
Maple Brown Sugar Granola Clusters
These maple brown sugar granola clusters are chunky, sweet, and absolutely perfect for fall snacking! They’re way better than store-bought granola because you can control the sweetness and make them as clustery as you want. The maple and brown sugar create the most amazing flavor that tastes like autumn in every bite. They’re perfect for breakfast, snacking, or adding to yogurt for extra crunch!
Time: 40 minutes | Serves: 10
Ingredients
- 3 cups old-fashioned oats
- 1 cup sliced almonds
- 1/2 cup pumpkin seeds
- 1/2 cup pure maple syrup
- 1/4 cup brown sugar, packed
- 1/4 cup melted butter
- 1 teaspoon vanilla extract
- 1 teaspoon cinnamon
- 1/2 teaspoon salt
- 1/2 cup dried cranberries
Instructions
- Preheat your oven to 325°F and line a large baking sheet with parchment paper. The slightly lower temperature helps create clusters without burning the edges.
- In a large bowl, combine oats, sliced almonds, pumpkin seeds, cinnamon, and salt. Mix everything together so the spices are evenly distributed throughout.
- In a separate bowl, whisk together maple syrup, brown sugar, melted butter, and vanilla extract until smooth and well combined. The mixture should be pourable but thick.
- Pour the wet ingredients over the dry ingredients and stir until everything is evenly coated and sticking together in clumps. This is what creates the clusters!
- Spread the mixture evenly on your prepared baking sheet, pressing it down slightly to encourage cluster formation. Don’t spread it too thin or you won’t get good clusters.
- Bake for 20-25 minutes, stirring once halfway through, until golden brown and fragrant. Let cool completely before breaking into clusters and adding dried cranberries!
Pumpkin Spice Rice Krispie Treats
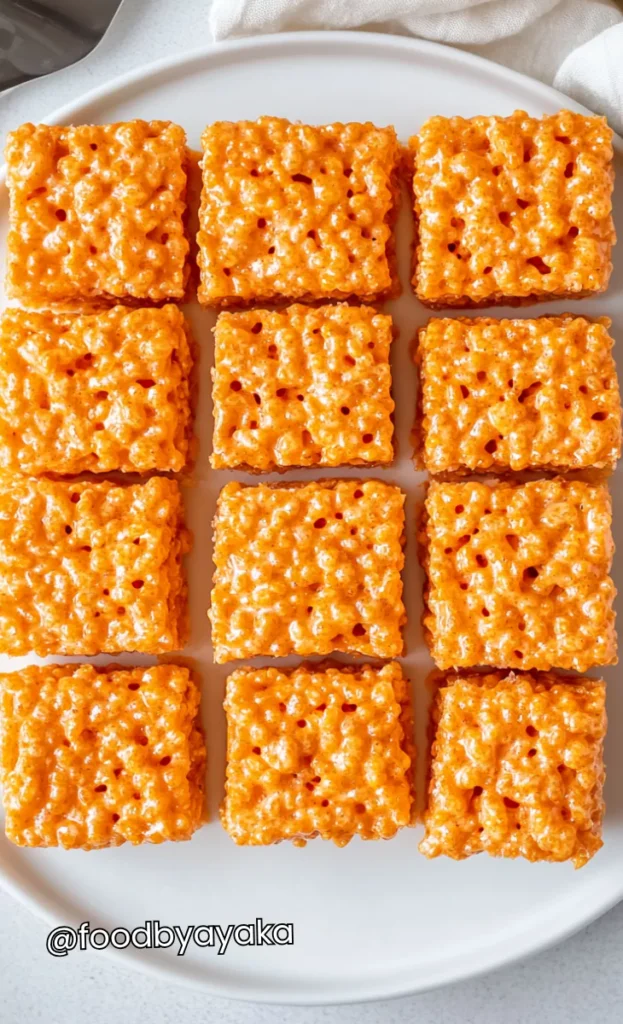
These pumpkin spice Rice Krispie treats are a fun fall twist on the classic recipe that everyone loves! They have all those warm autumn spices and a beautiful orange color that screams fall. They’re chewy, sweet, and have that nostalgic Rice Krispie texture but with a seasonal upgrade. Kids go absolutely crazy for these, and adults love them too because they taste like childhood with a grown-up fall flavor!
Time: 20 minutes | Serves: 16
Ingredients
- 6 cups Rice Krispies cereal
- 1 package (10 oz) marshmallows
- 3 tablespoons butter
- 1/4 cup pumpkin puree
- 1 teaspoon pumpkin pie spice
- 1/2 teaspoon vanilla extract
- Orange food coloring (optional)
- 1/4 teaspoon salt
Instructions
- Grease a 9×13 inch pan with butter or cooking spray and set aside. Line with parchment paper for easy removal if you want to cut perfect squares.
- In a large microwave-safe bowl, melt butter and marshmallows together in 30-second intervals, stirring between each, until completely melted and smooth.
- Quickly stir in pumpkin puree, pumpkin pie spice, vanilla extract, salt, and a few drops of orange food coloring if you want that perfect fall color.
- Add the Rice Krispies cereal to the marshmallow mixture and stir quickly until every piece of cereal is coated with the gooey marshmallow mixture.
- Press the mixture firmly and evenly into your prepared pan using a buttered spatula or your hands. Press firmly to ensure the treats hold together when cut.
- Let cool completely for about 30 minutes before cutting into squares. Store covered at room temperature for up to one week – if they last that long!