
Quick & Easy Recipes for Everyday Cooks
Welcome to Food By Ayaka!
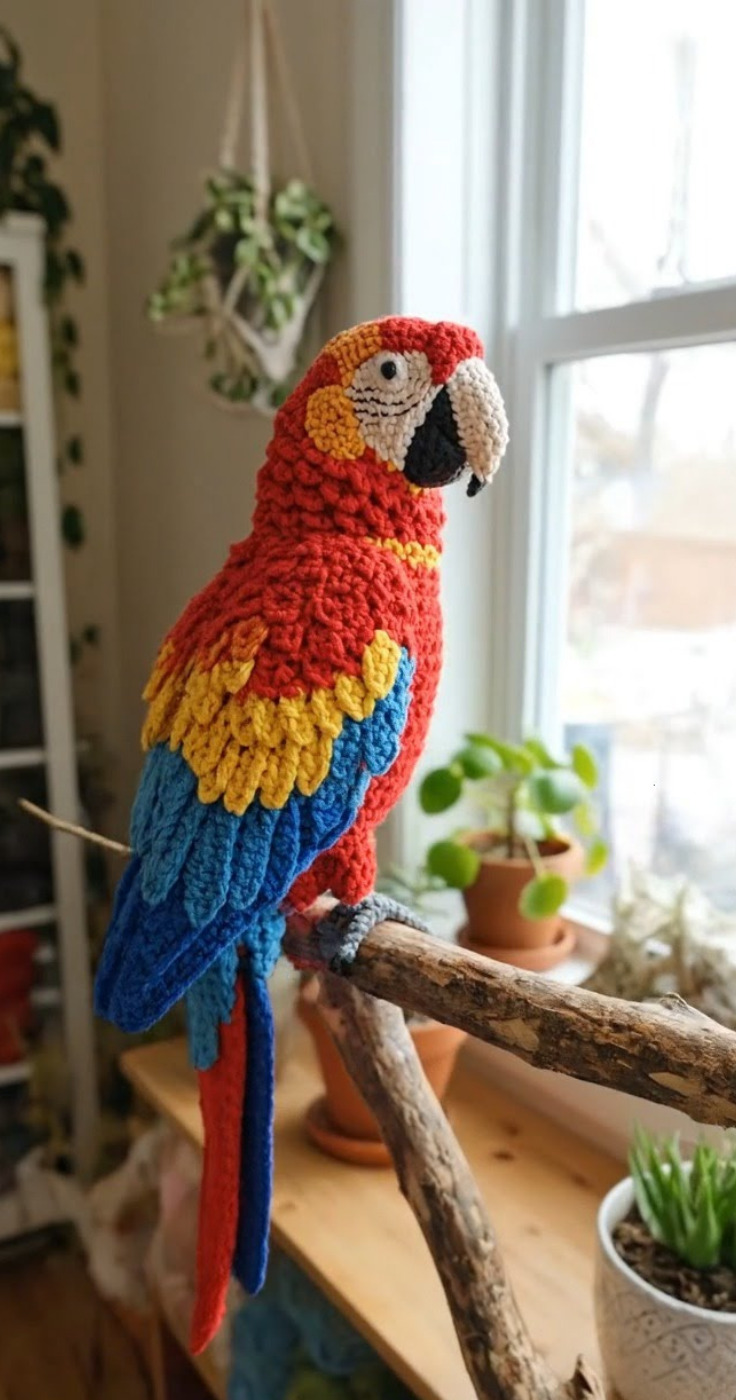
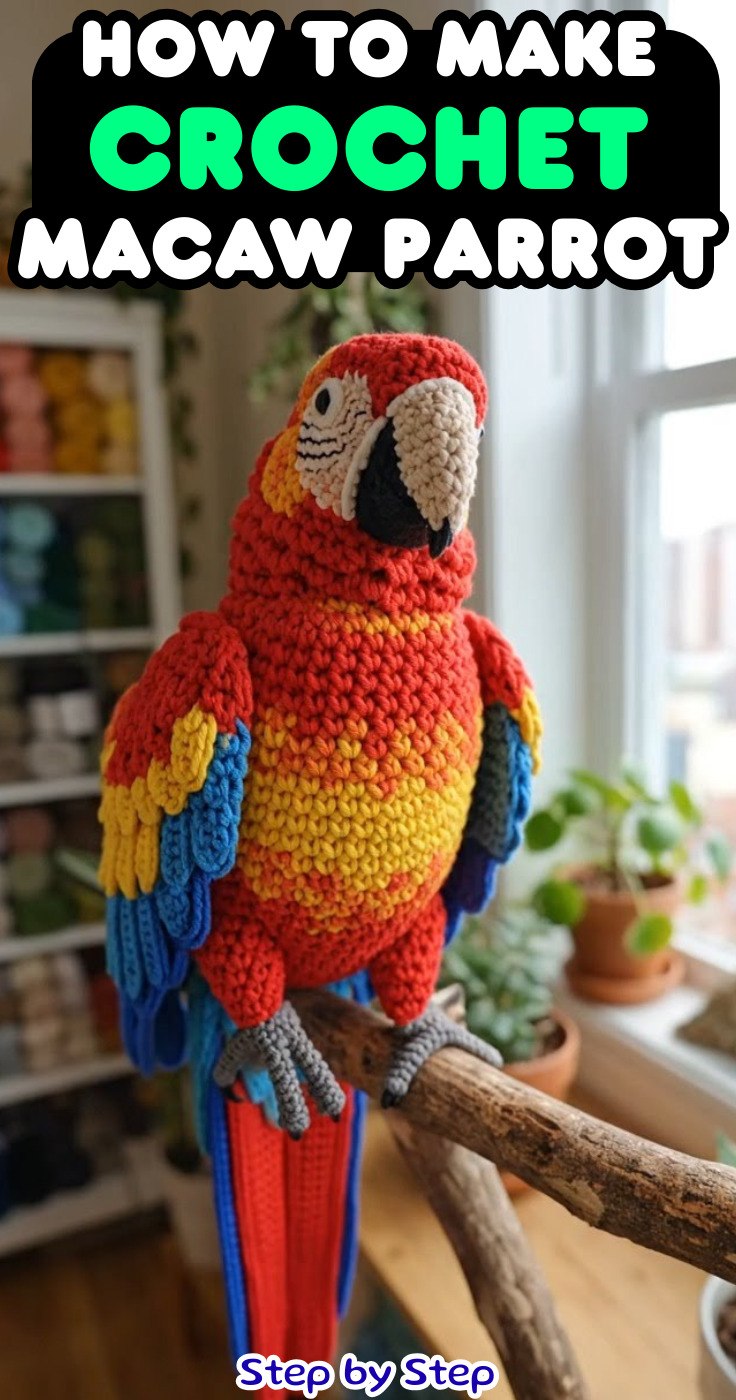
Realistic Crochet Macaw Parrot Pattern
If you love crochet and want to try something special, this beautiful macaw parrot is the perfect project. It looks real, colorful, and full of life. Yes, it takes time, but the result is truly worth it.
I made this style many times, and I can tell you — the magic is in the details. The feathers, the face lines, and the shape all work together. If you follow carefully, you will get a very close result.
In this guide, I will walk you step by step, in a simple way. No stress. Just take your time, enjoy the process, and trust your hands 🧶✨
🦜 Realistic Crochet Macaw Parrot Pattern (Step-by-Step)
🧵 Materials You Will Need
To get the same look, you must use the right materials:
- Cotton yarn (very important for clean stitches)
- Red yarn (main body)
- Yellow yarn (middle feathers)
- Blue yarn (wings and tail)
- Cream yarn (face and beak base)
- Black yarn (beak tip and eye details)
- Small grey yarn (feet)
- Crochet hook: 2.5 mm – 3 mm
- Safety eyes (10 mm)
- Fiberfill stuffing (firm quality)
- Yarn needle
- Stitch marker
- Scissors
- Optional: thin wire (for shaping feet)
👉 Tip: Cotton yarn gives that “professional clean look” you see in the photo.


✨ Abbreviations
- MR = Magic Ring
- sc = Single Crochet
- inc = Increase
- dec = Decrease
- sl st = Slip Stitch
- ch = Chain
🧠 Head and Neck (Main Shape)
This part is very important because it defines the personality of your parrot.
Start with red yarn.
- MR, 6 sc
- inc ×6 → 12
- (1 sc, inc) ×6 → 18
- (2 sc, inc) ×6 → 24
- (3 sc, inc) ×6 → 30
- (4 sc, inc) ×6 → 36
- (5 sc, inc) ×6 → 42
8–12. 42 sc
Now insert the safety eyes between round 9 and 10.
Keep about 10 stitches between them.
This spacing is important. If eyes are too close or too far, the face will not look right.
- (5 sc, dec) ×6 → 36
- (4 sc, dec) ×6 → 30
- (3 sc, dec) ×6 → 24
Start stuffing now. Do not overfill. The head must be round, not hard.
16–20. 24 sc
This creates the neck tube.
🧍 Body (Strong and Balanced)
Continue directly from the neck.
- (3 sc, inc) ×6 → 30
- (4 sc, inc) ×6 → 36
23–30. 36 sc
This is the main body. Keep your stitches tight and even.
- (4 sc, dec) ×6 → 30
- (3 sc, dec) ×6 → 24
- (2 sc, dec) ×6 → 18
Stuff firmly. The body should feel strong and stable.
🐦 Beak (Two Parts – Very Important)
The beak gives character to your bird.
Upper Beak
Start with cream yarn:
- MR, 6
- (1 sc, inc) ×3 → 9
3–6. 9 sc
Switch to black yarn:
7–9. 9 sc
Lightly stuff and shape it slightly curved.
Lower Beak
Using black yarn:
- MR, 6
2–5. 6 sc
Flatten gently and sew under the upper beak.
👉 When attaching:
- The beak should sit just below the eyes
- Slight forward angle looks more natural
👁 Face Details (The Secret to Realism)
This is where your parrot becomes “alive.”
Use cream yarn to create a soft face area (you can crochet or embroider it).
Then take red yarn and stitch thin lines around the eye.
Make small curved lines going outward.
👉 This detail is VERY important.
Without it, your parrot will not look realistic.
🪽 Wings (Base Structure)
Make 2 wings using blue yarn:
- MR, 6
- inc ×6 → 12
- (1 sc, inc) ×6 → 18
- (2 sc, inc) ×6 → 24
5–8. 24 sc
Flatten the shape slightly.
Do not stuff.
🪶 Feather Layers (Most Important Part)
This is what makes the parrot look real.
You will create many small feather pieces.
Red Feathers (Top Layer)
- ch 6
- sc back
Make 20–25 pieces
Yellow Feathers (Middle Layer)
- ch 8
- sc back
Make 15–20 pieces
Blue Feathers (Bottom Layer)
- ch 10–12
- sc back
Make 15 pieces
How to Attach Feathers
This step must be done slowly.
- Start with blue feathers (bottom)
- Add yellow in the middle
- Finish with red on top
👉 Overlap each feather like roof tiles
👉 This gives volume and texture
Take your time here. This is where your project becomes beautiful.
🧵 Tail (Long and Elegant)
Make 4–6 pieces:
- ch 25–30
- sc back
Use:
- Blue for sides
- Red for center
Attach under the body.
The tail should be long and straight.
🦶 Feet and Perch
Simple ring:
- MR, 6 sc
You can attach directly to a branch or create loops.
Optional: use wire inside for grip.
🧩 Assembly (Take Your Time)
Now bring everything together.
- Sew beak to head
- Attach wings slightly angled downward
- Add tail centered
- Place feathers last
👉 Always check balance and symmetry
💡 Tips From My Experience
- Use a smaller hook for tighter stitches
- Stuff little by little, not all at once
- Always step back and look at your work
- Adjust shape with your hands
Crochet is not just pattern — it is also feeling and shaping.
❗ Common Mistakes to Avoid
- Loose stitches → looks messy
- Not enough feathers → flat look
- Wrong color placement → not realistic
- Skipping face lines → big difference
- Short tail → wrong style
🌟 Why You’ll Love This Project
This is not just a toy. It is a piece of art.
You will learn:
- shaping
- layering
- color balance
- patience
And when you finish… you will feel proud.
🧶 Final Words
Take your time with this pattern. Do not rush.
Even if it is your first time making something like this, you can do it. Just follow step by step.
And remember, the beauty is in the small details 💕