
Quick & Easy Recipes for Everyday Cooks
Welcome to Food By Ayaka!
Christmas Gooey Butter Cookies Recipe
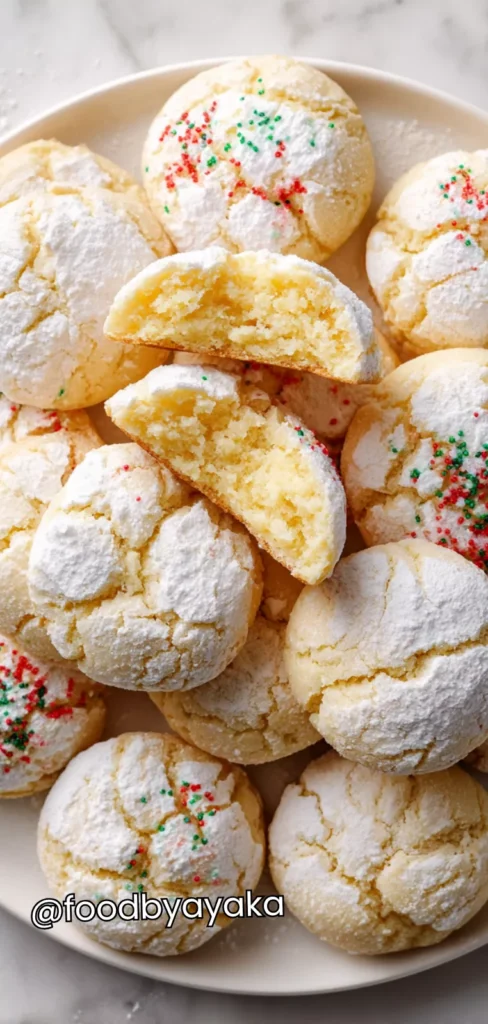
Making these Christmas Gooey Butter Cookies is such a joy during the holidays — they’re buttery, soft, and have that melt-in-your-mouth sweetness that feels like a warm Christmas hug. I remember the first time I baked them; the smell filled my kitchen, and it instantly felt festive. The cookies are rich with cream cheese and butter, giving them that gooey center that everyone loves. What makes them extra special is the snow-like powdered sugar coating that cracks beautifully as they bake, creating a cozy homemade look that fits perfectly on any Christmas cookie platter.
I have made these cookies so many times that I’ve learned little tricks along the way. I use real vanilla extract, softened cream cheese, and a high-quality yellow cake mix for that classic bakery flavor. Always chill the dough — that’s the secret to the perfect texture. When the dough is firm, the cookies bake up thick and chewy instead of flat and crispy.
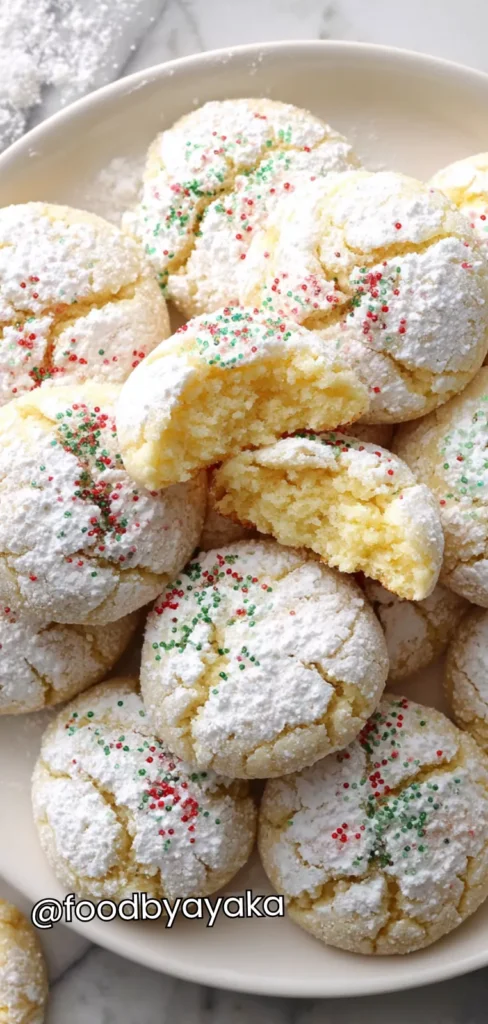
You can serve these cookies warm right from the oven, some dusted again with powdered sugar for that fresh snowfall effect, also with colorful red and green sprinkles for a cheerful holiday look.
It’s Perfect For:
- Christmas cookie swaps or office parties
- Homemade edible gifts for friends and neighbors
- A sweet finish after Christmas Eve dinner
- Baking with kids during the holidays
- Enjoying with a cozy drink by the tree lights
Ingredients
- 1 box (15.25 oz) yellow cake mix
- 1/2 cup (1 stick) unsalted butter, softened
- 1 package (8 oz) cream cheese, softened
- 1 large egg
- 1 teaspoon pure vanilla extract
- 1/2 cup powdered sugar (for coating)
- Red and green sprinkles (optional, for garnish)
Kitchen Equipment You’ll Need
- Large mixing bowl
- Hand or stand mixer
- Rubber spatula
- Measuring cups and spoons
- Baking sheet
- Parchment paper
- Wire cooling rack
How to Make Christmas Gooey Butter Cookies
Step 1
Cream the butter and cream cheese: In a large mixing bowl, beat together the softened butter and cream cheese using a hand mixer or stand mixer until the mixture is smooth and creamy. This step is key because it creates the rich, buttery base that gives these cookies their soft, gooey texture.
Step 2
Add the wet ingredients: Crack in the egg and pour in the vanilla extract. Continue mixing on medium speed until everything is fully incorporated. The batter should look silky and slightly fluffy at this point.
Step 3
Add the cake mix: Gradually add the yellow cake mix to the bowl, about half at a time, mixing well after each addition. The dough will start to thicken and become sticky — that’s exactly what you want. Scrape down the sides of the bowl to make sure no dry cake mix is left unmixed.
Step 4
Chill the dough: Cover the bowl with plastic wrap and refrigerate for at least 30 minutes. Chilling the dough helps it firm up so the cookies keep their shape while baking and stay chewy in the middle.
Step 5
Shape and coat the cookies: Preheat your oven to 350°F (175°C) and line a baking sheet with parchment paper. Scoop tablespoon-sized portions of dough and roll them into balls using your hands. Roll each ball generously in powdered sugar until fully coated — this creates that classic crackled, snow-dusted look once baked.
Step 6
Bake the cookies: Place the dough balls about 2 inches apart on the prepared baking sheet. Bake for 10–12 minutes, or until the edges are set but the centers still look soft. Don’t overbake — they’ll continue to cook a little as they cool.
Step 7
Cool and decorate: Let the cookies cool on the baking sheet for about 5 minutes before transferring them to a wire rack. Once cooled, sprinkle a few red and green sprinkles on top for a festive touch. The powdered sugar will cling lightly to the surface, giving them that snowy Christmas look.
Tips for the Perfect Christmas Gooey Butter Cookies
- Use room-temperature ingredients.
Softened butter and cream cheese mix smoothly, giving you a silky dough and that perfect gooey center. - Chill your dough before baking.
Cold dough prevents spreading and keeps the cookies tall, soft, and pillowy inside. - Coat them twice in powdered sugar.
Roll the dough balls once, chill briefly, then coat again before baking — it makes the “snowy” look even prettier. - Do not overbake.
Remove them when the edges are set but the center still looks soft. They’ll finish baking as they cool, keeping that gooey texture. - Add festive toppings right after baking.
Sprinkles or crushed candy canes stick better when the cookies are still warm from the oven. - Use a cookie scoop for even portions.
This ensures consistent size and even baking every time. - Store with parchment paper between layers.
It prevents sticking and helps maintain that soft, delicate texture.
Optional Ingredients
- 1 teaspoon almond extract (adds a nutty depth)
- 1/2 cup white chocolate chips (for extra sweetness)
- A pinch of nutmeg (adds warmth)
- 1/4 cup crushed candy canes (peppermint flavor)
- A few drops of green or red food coloring (festive look)
- Sea salt flakes (for contrast and balance)
How to Serve Christmas Gooey Butter Cookies?
I love serving these cookies when they’re slightly warm — the inside stays gooey while the powdered sugar melts just a little, creating the perfect bite. Arrange them on a large white platter or a rustic wooden board lined with parchment paper. Dust them lightly with fresh powdered sugar before serving; it makes them look like they’ve been kissed by snow. If you’re hosting guests, set the platter beside mugs of hot chocolate, peppermint coffee, or warm apple cider for a cozy, Christmassy setup.
For an extra festive touch, I sometimes place a few crushed candy canes or small candy ornaments around the platter. The bright reds and greens make the cookies stand out beautifully, and the whole setup looks like it came straight from a holiday magazine. You can even add a few sprigs of rosemary or pine needles for that rustic winter charm.
These cookies are also perfect for holiday dessert boards or cookie swaps. Pair them with chocolate crinkle cookies, gingerbread men, or sugar cookies for a colorful variety. The rich, buttery taste of the gooey butter cookies balances well with spiced and chocolatey flavors. They also travel well, so they’re wonderful for gifting — just pack them in a festive tin lined with wax paper to keep them fresh and soft.
Is Christmas Gooey Butter Cookies Healthy?
These cookies aren’t exactly a low-calorie treat, but they’re meant to be a holiday indulgence. They’re rich in butter, sugar, and cream cheese, which makes them deliciously soft and flavorful. Like most Christmas sweets, they’re best enjoyed in moderation.
That said, you can make small tweaks to lighten them up — like using light cream cheese, reducing the sugar slightly, or using a sugar-free cake mix. But honestly, I believe the holidays are a time to enjoy good food and sweet memories. A cookie or two won’t hurt, especially when shared with the people you love.
Variations and Substitutions
- Red Velvet Gooey Cookies: Use red velvet cake mix and white chocolate chips. They look stunning and taste like a mix of velvet cake and cheesecake.
- Chocolate Fudge Cookies: Use chocolate cake mix and drizzle melted dark chocolate on top once cooled for an indulgent treat.
- Lemon Snow Cookies: Swap yellow mix for lemon and add zest — bright, tangy, and perfect for those who love citrus.
- Peppermint Mocha Cookies: Add a teaspoon of instant coffee and crushed candy canes to make a coffeehouse-inspired version.
- Funfetti Christmas Cookies: Use a funfetti cake mix and toss in red and green sprinkles for a kid-friendly twist.
- Salted Caramel Gooey Cookies: Mix in caramel bits and sprinkle with sea salt before baking for that sweet-salty flavor.
- Pumpkin Spice Cookies: Use spice cake mix and a few spoonfuls of pumpkin purée for a fall-to-winter transitional flavor.
- Gluten-Free Gooey Cookies: Use gluten-free cake mix and certified gluten-free powdered sugar for a perfect allergy-friendly option.
How to Store and Reheat
Let your cookies cool completely before storing them to prevent moisture buildup. Place them in an airtight container, layering parchment paper between each row to avoid sticking. They stay soft for up to 5 days at room temperature or a week in the refrigerator. You can also freeze the dough balls for up to two months — just thaw slightly before baking.
When reheating, warm a few cookies in the microwave for 10–12 seconds to make the centers soft again. You can also reheat them in a preheated oven at 300°F (150°C) for about 3 minutes. This lightly revives their buttery aroma and texture, making them taste just like freshly baked ones.
Frequently Asked Questions About Christmas Gooey Butter Cookies
Can I freeze the dough or baked cookies?
Yes! You can freeze the dough balls on a tray, then store them in freezer bags. They can also be baked straight from frozen — just add two extra minutes to the baking time. Baked cookies also freeze well; just thaw at room temperature before serving.
Why did my cookies turn out flat?
Flat cookies usually mean your butter or cream cheese was too soft, or the dough wasn’t chilled long enough. Always refrigerate for at least 30 minutes before baking for the perfect shape.
How do I make them more gooey inside?
Take them out of the oven when the centers are slightly underbaked. As they cool, the texture sets but stays soft and creamy inside.
Can I make these cookies ahead of time for a party?
Absolutely! You can make the dough two days in advance and store it in the fridge. Just roll and bake them fresh before serving — your kitchen will smell amazing, and they’ll taste freshly made.

Christmas Gooey Butter Cookies Recipe
Course: DessertCuisine: AmericanDifficulty: EasyServings
24
cookiesPrep time
15
minutesCooking time
12
minutesMake your holidays sweeter with these soft and buttery Christmas Gooey Butter Cookies! This easy cookie recipe features a gooey cream cheese center, a snowy powdered sugar coating, and festive sprinkles — perfect for Christmas parties, gifting, or cozy nights by the fire.
Ingredients
1 box (15.25 oz) yellow cake mix
1/2 cup (1 stick) unsalted butter, softened
1 package (8 oz) cream cheese, softened
1 large egg
1 teaspoon pure vanilla extract
1/2 cup powdered sugar (for coating)
Red and green sprinkles (optional, for garnish)
Directions
- Cream the butter and cream cheese: In a large mixing bowl, beat together the softened butter and cream cheese using a hand mixer or stand mixer until the mixture is smooth and creamy. This step is key because it creates the rich, buttery base that gives these cookies their soft, gooey texture.
- Add the wet ingredients: Crack in the egg and pour in the vanilla extract. Continue mixing on medium speed until everything is fully incorporated. The batter should look silky and slightly fluffy at this point.
- Add the cake mix: Gradually add the yellow cake mix to the bowl, about half at a time, mixing well after each addition. The dough will start to thicken and become sticky — that’s exactly what you want. Scrape down the sides of the bowl to make sure no dry cake mix is left unmixed.
- Chill the dough: Cover the bowl with plastic wrap and refrigerate for at least 30 minutes. Chilling the dough helps it firm up so the cookies keep their shape while baking and stay chewy in the middle.
- Shape and coat the cookies: Preheat your oven to 350°F (175°C) and line a baking sheet with parchment paper. Scoop tablespoon-sized portions of dough and roll them into balls using your hands. Roll each ball generously in powdered sugar until fully coated — this creates that classic crackled, snow-dusted look once baked.
- Bake the cookies: Place the dough balls about 2 inches apart on the prepared baking sheet. Bake for 10–12 minutes, or until the edges are set but the centers still look soft. Don’t overbake — they’ll continue to cook a little as they cool.
- Cool and decorate: Let the cookies cool on the baking sheet for about 5 minutes before transferring them to a wire rack. Once cooled, sprinkle a few red and green sprinkles on top for a festive touch. The powdered sugar will cling lightly to the surface, giving them that snowy Christmas look.